RUN CONSTRUCTION
By the time I got to building the new run, the chicks were in the brooder and getting big. I had left the old run open for the chickens to use when it rained and to dust bathe. I closed it off and tore it down to reuse the materials for the portion of the new run that extended along the back of the new coop that shelters the dust bathing area and the brooder run.

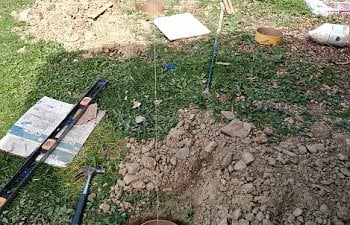
I ripped an 8' PT 2x4 in half, set the two pieces end to end along the back of the coop level with the underside of the rear window trim and screwed them to the wall and into the studs. These will serve as the hinge points for the roof framing over the run extension.
I measured the required distance out from the back of the coop and marked the ground for the outer run wall of the extension. I ended up making the extension flush with the main run rear wall instead of the way it is shown on the plans.
There was a pretty deep hole and generally uneven ground behind the coop. Before backfilling, I screwed two PT 2x8s (rated for ground contact) to the rim joist at the rear of the coop to keep the fill from flowing under the coop.
I got 2 loads of #1/#2 crushed gravel mix and spread and tamped that into the space to level it out. Then I got 600 pounds of mason sand (for a mere $6) and spread a layer of that over the gravel and tamped again. This gave me a nice base to lay out the PT 2x4 framing for the wall.
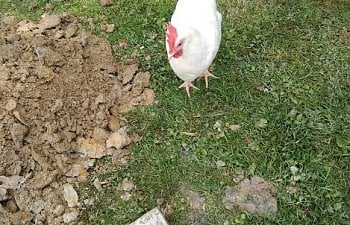
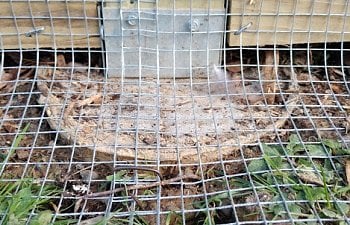
I then framed in the dust bathing area with a new ground contact rated PT 2x8. I used the rest of my mason sand, a large bag of peat moss and all the wood ash in my stove and ash bucket to fill the dust bath. I wasn't 2 minutes done with that when the girls showed up to see what I was up to.
I think they approve.
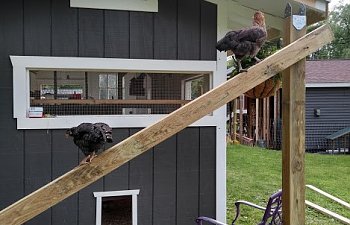
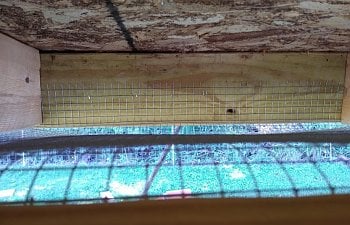
After finishing up the outer wall framing, I made two roof frames, each with the long ends bevel cut through the table saw to 25°. After removing the polycarbonate roofing panels from the old run, I measured the distance between the screw holes on the panels and centered a support 2x4 in my new roof framing at that distance so that I would be able to use the old holes. I used two 30" long piano hinges on each roof assembly to attach them to the wall ledge board then attached the closure strips.
I gang ripped the old polycarb roof panels by stacking them up after lining up the screw holes then clamping a 4' level across them and cutting them with the blade reversed on my versa-cut circular saw. I wanted the roofing of one assembly to overlap the second. Because I will be opening the dust bath roof far more often than the brooder roof, I overlapped the dust bath roof on top of the brooder roof. The roof assemblies are heavy. I will eventually put heavy duty handles on them to help lift them but they certainly needed prop sticks to hold them open safely. I just used more pieces of PT 2x4 salvaged from the old run.
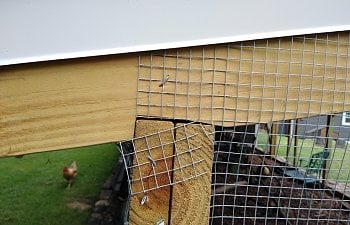
I shoveled up 3 loads of wood chips and dumped them into the brooder run then installed salvaged 1/2" HC to staple between the dust bath area and the brooder run.
I wasn't happy with the gap in the ends of the roof.
It turns out that my 1x2 furring strips fit the gap perfectly so I cut up some scrap, slid it between the roof and the framing then screwed down through the roof and furring strips and into the framing to close the gap.
After attaching the rest of the HC and adding some old logs and branches from the old run, I opened the brooder run pop door for business.
Fabio and the girls took notice that those noisy little peeping things were now outside.
Now, on to the hardest part: digging the holes for the concrete piers I'm using for the main section of the run foundation. Uugh! I HATE digging through the hard pan up here! And I'm right next to the woods so I know roots are inevitable. This is why the run was delayed. I know what's coming and I have been trying to work myself up to it. I've been watching entirely too much chicken TV and enjoying the relative peace between me and Fabio. That is about to come to a screeching halt...
After running a straight line out off the run extension wall down towards "the chicken bush" I found that my plans for a 32' x 12' run were not going to fit without cutting out part of the chicken bush. NOT happening. They love this thing. It is an old style Quince and great hawk cover.
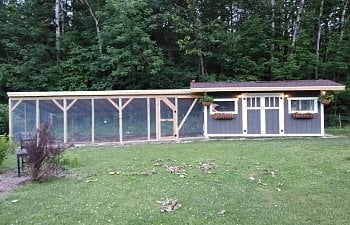
So the new run will only be 28' long. That will still give the new flock a total area of about 17.7 sq ft per bird between the run and the coop. And this is for winter time only as I always allow them access to their pen after I feed them in the morning. I estimate their pen size at roughly 1/3-acre. This is the basic layout of their space.
Yellow line is the poultry netting, red are the gates, white is the new coop and blue is the run.
After running two string lines out parallel to the long sides of the coop and marking my pier locations I started digging. I needed to go down 42". I hit a big flat rock at 32" in the very first hole.
I made arrangements to bring in a Groundhog hydraulic auger. That was the biggest waste of money ever. As soon as the bit hit a rock, it bound up because all rocks up here are well embedded in hardpan clay. The only thing the Groundhog did do was make sure Fabio was good and mad at me again. He slammed into the back of my leg on one of my trips into the pen to work.
To deal with the first hole and the rock that wouldn't budge, I used a spud bar that comes to a point instead of a blade. DH held the bar for me while I hit it with a sledge hammer and the rock finally broke up enough to remove it from the hole and get down to code depth.
The rest of the holes were finished for the front wall and the forms were put in place to be essentially level with the ground surface. Normally, I would keep them a couple of inches above ground level but I wanted things tighter to the ground for when the bottom framing for the predator apron went in.
This little girl loved to follow me around to eat any worms that were unearthed during the digging. (Note to self: get a fecal float done to check for tapeworms!)
I like to use the adjustable 1" raised post bases that bolt on to the piers so I embedded 1/2" x 9" galvanized J-bolts into the wet concrete of each pier. It took me two days to finish all the digging, setting the forms and mixing and pouring the concrete. Then another two days to let my back quiet down.
Things went pretty fast after that. I didn't take pictures at every step of construction but the general idea is very straight forward.
I ripped an 8' PT 2x4 in half, set the two pieces end to end along the back of the coop level with the underside of the rear window trim and screwed them to the wall and into the studs. These will serve as the hinge points for the roof framing over the run extension.
I measured the required distance out from the back of the coop and marked the ground for the outer run wall of the extension. I ended up making the extension flush with the main run rear wall instead of the way it is shown on the plans.
There was a pretty deep hole and generally uneven ground behind the coop. Before backfilling, I screwed two PT 2x8s (rated for ground contact) to the rim joist at the rear of the coop to keep the fill from flowing under the coop.
I got 2 loads of #1/#2 crushed gravel mix and spread and tamped that into the space to level it out. Then I got 600 pounds of mason sand (for a mere $6) and spread a layer of that over the gravel and tamped again. This gave me a nice base to lay out the PT 2x4 framing for the wall.
I then framed in the dust bathing area with a new ground contact rated PT 2x8. I used the rest of my mason sand, a large bag of peat moss and all the wood ash in my stove and ash bucket to fill the dust bath. I wasn't 2 minutes done with that when the girls showed up to see what I was up to.
After finishing up the outer wall framing, I made two roof frames, each with the long ends bevel cut through the table saw to 25°. After removing the polycarbonate roofing panels from the old run, I measured the distance between the screw holes on the panels and centered a support 2x4 in my new roof framing at that distance so that I would be able to use the old holes. I used two 30" long piano hinges on each roof assembly to attach them to the wall ledge board then attached the closure strips.
I shoveled up 3 loads of wood chips and dumped them into the brooder run then installed salvaged 1/2" HC to staple between the dust bath area and the brooder run.
After attaching the rest of the HC and adding some old logs and branches from the old run, I opened the brooder run pop door for business.
Now, on to the hardest part: digging the holes for the concrete piers I'm using for the main section of the run foundation. Uugh! I HATE digging through the hard pan up here! And I'm right next to the woods so I know roots are inevitable. This is why the run was delayed. I know what's coming and I have been trying to work myself up to it. I've been watching entirely too much chicken TV and enjoying the relative peace between me and Fabio. That is about to come to a screeching halt...
After running a straight line out off the run extension wall down towards "the chicken bush" I found that my plans for a 32' x 12' run were not going to fit without cutting out part of the chicken bush. NOT happening. They love this thing. It is an old style Quince and great hawk cover.
After running two string lines out parallel to the long sides of the coop and marking my pier locations I started digging. I needed to go down 42". I hit a big flat rock at 32" in the very first hole.
I made arrangements to bring in a Groundhog hydraulic auger. That was the biggest waste of money ever. As soon as the bit hit a rock, it bound up because all rocks up here are well embedded in hardpan clay. The only thing the Groundhog did do was make sure Fabio was good and mad at me again. He slammed into the back of my leg on one of my trips into the pen to work.
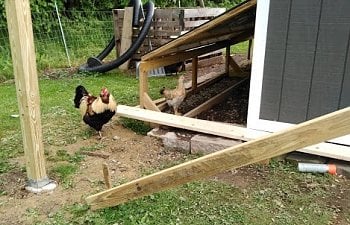
On a side note regarding my dear boy, Fabio. He is insecure but desperately wants to protect his girls. He is only a 6 pound chicken with stumpy little spurs. His floggings do not hurt me. Regardless of how his behavior may appear to those reading this extremely long article, he is NOT human aggressive. It is only me he behaves this way with and it is because of all the work I have done in his territory. He hates it and this is the result. It is my choice to deal with him. I have had dogs with resource guarding issues that I have worked with. They learned to control themselves. Why is it such a common theme to say "throw that rotten bird in the crock-pot" but no one immediately jumps to "kill that rotten dog"? I choose to work with Fabio because I understand where he is coming from and he is a very good rooster in all other regards. He was not like this before the construction began. He was never a big fan of me and did act out a few times, but nothing like this.
When I see him preparing to do battle with me, I squash him to the ground then scoop him up and waltz around with him or sit down with him and stand him on my leg and try to get his rage under control. It works for him. For the rest of that day, he will behave as I have once again reassured him I am not going to hurt him or put up with his nonsense. When work resumes the next day, all bets are off and we start again. I feel that he will come around again when the work is done.
To deal with the first hole and the rock that wouldn't budge, I used a spud bar that comes to a point instead of a blade. DH held the bar for me while I hit it with a sledge hammer and the rock finally broke up enough to remove it from the hole and get down to code depth.

The rest of the holes were finished for the front wall and the forms were put in place to be essentially level with the ground surface. Normally, I would keep them a couple of inches above ground level but I wanted things tighter to the ground for when the bottom framing for the predator apron went in.
This little girl loved to follow me around to eat any worms that were unearthed during the digging. (Note to self: get a fecal float done to check for tapeworms!)
I like to use the adjustable 1" raised post bases that bolt on to the piers so I embedded 1/2" x 9" galvanized J-bolts into the wet concrete of each pier. It took me two days to finish all the digging, setting the forms and mixing and pouring the concrete. Then another two days to let my back quiet down.
Things went pretty fast after that. I didn't take pictures at every step of construction but the general idea is very straight forward.
Post bases bolted onto the J-bolts embedded in the concrete piers. 4x4 PT posts attached with structural screws.
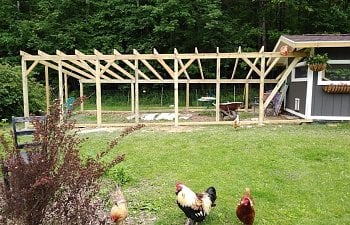
Post/beam caps designed for double 2x beams attached to the tops of the posts. I used double PT 2x6's. Posts were spaced 8' OC.
First post of front wall with plumb brace. The chicks could not resist checking this out.
Rear wall post is 2' shorter than the front wall posts to maintain the minimum 12/2 pitch for asphalt shingles.
Birds mouth cuts on the rafters to sit on the beams.
All posts, beams and rafters installed with rafter ties. Cross bracing added to reduce east/west racking. Bottom and 4' OC vertical framing installed for HC attachment.
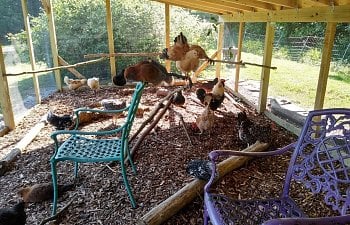
Roof decking and underlayment installed, then the 1/2" HC. I used 3/4" galvanized poultry staples to secure the HC to the framing. Two mid-sized pickup truck full loads of FREE wood chips spread.
The hardware cloth was installed vertically in 4' wide strips. I ran the HC up the walls, under the rafter tails and up about 2 inches or more over the ends of the rafter tails. The 5/4 deck boards I used for fascia secure the HC to the rafter tails. I then added more staples (pneumatic 1/2" as I couldn't possibly swing a hammer in there) to secure the HC to back of the fascia boards.
The run with the roofing finished, (wo)man door made and installed. It was open for business at this point but still needed a bit more work to finish it.
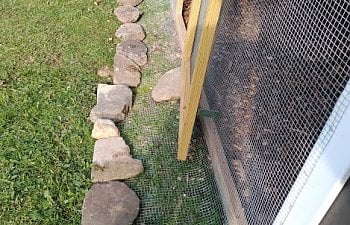
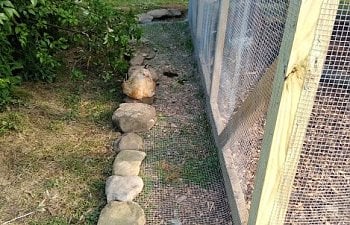
The predator apron extends out from 18" to 24" depending on the strip I cut and is pinned on the outer edges with landscape pins.
The edges of the apron were then lined with field stones I collected from the roadside.
The rest of the apron was covered with #2 rounds that I got from a local quarry for just under $20 for 1 ton.
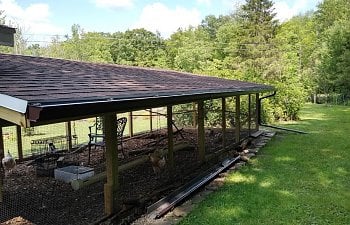
Gutters installed along the back of the run to divert water to "the moat" that runs between the woods and our lawn. I will install a gutter on the rear of the coop soon that will flow onto the run roof and into it's gutter.
Post/beam caps designed for double 2x beams attached to the tops of the posts. I used double PT 2x6's. Posts were spaced 8' OC.
First post of front wall with plumb brace. The chicks could not resist checking this out.
Rear wall post is 2' shorter than the front wall posts to maintain the minimum 12/2 pitch for asphalt shingles.
Birds mouth cuts on the rafters to sit on the beams.
All posts, beams and rafters installed with rafter ties. Cross bracing added to reduce east/west racking. Bottom and 4' OC vertical framing installed for HC attachment.
Roof decking and underlayment installed, then the 1/2" HC. I used 3/4" galvanized poultry staples to secure the HC to the framing. Two mid-sized pickup truck full loads of FREE wood chips spread.

The hardware cloth was installed vertically in 4' wide strips. I ran the HC up the walls, under the rafter tails and up about 2 inches or more over the ends of the rafter tails. The 5/4 deck boards I used for fascia secure the HC to the rafter tails. I then added more staples (pneumatic 1/2" as I couldn't possibly swing a hammer in there) to secure the HC to back of the fascia boards.
The run with the roofing finished, (wo)man door made and installed. It was open for business at this point but still needed a bit more work to finish it.
The predator apron extends out from 18" to 24" depending on the strip I cut and is pinned on the outer edges with landscape pins.
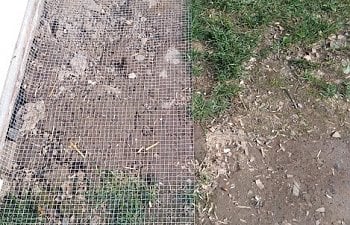
The edges of the apron were then lined with field stones I collected from the roadside.
The rest of the apron was covered with #2 rounds that I got from a local quarry for just under $20 for 1 ton.
Gutters installed along the back of the run to divert water to "the moat" that runs between the woods and our lawn. I will install a gutter on the rear of the coop soon that will flow onto the run roof and into it's gutter.
") Very cool coop!
Very cool coop! Oooh, a serial story!
") Thank you so much for posting in such detail—it is very generous of you. I'm probably going to owe you brownies or a tea towel or something for stealing so many ideas and design elements!
Thank you so much for posting in such detail—it is very generous of you. I'm probably going to owe you brownies or a tea towel or something for stealing so many ideas and design elements! 

 but I see you are using wood chips. Why did you choose this material? Where did you get your chips from?