For a little introduction, I decided to go into chicken keeping because my 15 year old daughter is leaning towards a vegan diet because of the horror stories she's read about commercial livestock living conditions and slaughtering techniques. She is very cool with the idea of fresh, organic eggs that come from happy, well-cared for chickens. We have the room, and I had leftover building supplies from a recent house addition, tearing out an old cabin and having a house built for my mom & step dad and even a tree house we built the kids about 10 years ago. plus some other smaller projects over the years. So I started planning.
My husband's main condition of me ordering chickens was that he wasn't going to have to do anything or be responsible for any of their care, so I spoke with my mom (next-door-neighbor) and she excitedly agreed that two of the chickens would be hers and she would contribute the cost of 2 chicks plus an appropriate percentage of the food as well as help with building the coop and caring for the chickens if I were away from home. My daughter also agreed to help with their care and coop building. I enlisted an additional partner, my friend Jennifer who not only is interested in organic, eggs from happy local chickens but also knew how to use power tools. She'll contribute the cost of 2 chicks and their feed as well and be a back-up chicken keeper in the rare cases where my family and my mom would be away over the same time period.
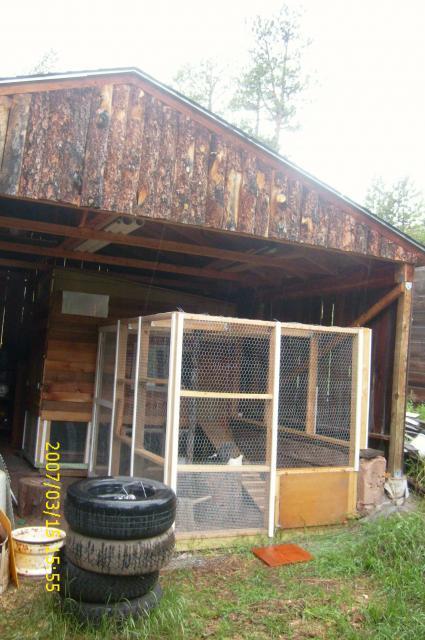
So - Day 1, June 10th - I spent a big chunk of the day cleaning out space in this big garage structure we have on the property between my house and my mom's house. It has a great roof, three sides that are made of rough pine and therefor drafty and an open front that faces South East. I also stopped by the local lumber yard and picked up a bunch of 2"X4"s.
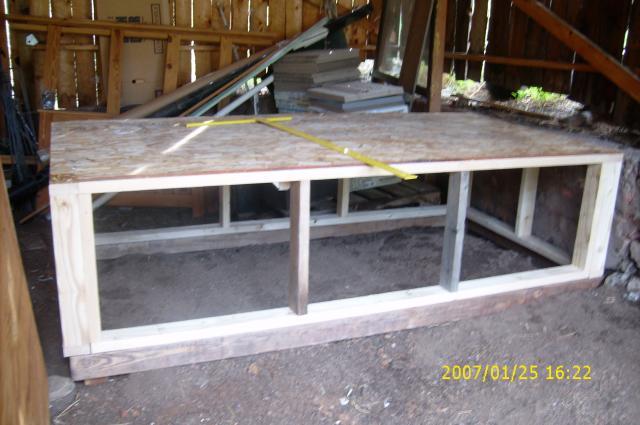
Day 2, June 11th - Jennifer arrives and Mom comes over and we put together the 24" high base that would support the coop. We created the 4'X8' foundation out of pressure treated 2"X4"s reinforced in each corner with a piece of 4"X4" cedar that I had left over from some raised planter beds I'd made the year before. The floor of the coop was a 4'X8' plywood political candidate sign that I had leftover from the 2010 US Senatorial elections. After the foundation was dug down and leveled, my daughter helped me staple 24" chicken wire around the bottom of the base. and the base was lifted on top and screwed down. So far, all of the nails and screws are also leftovers from other projects.
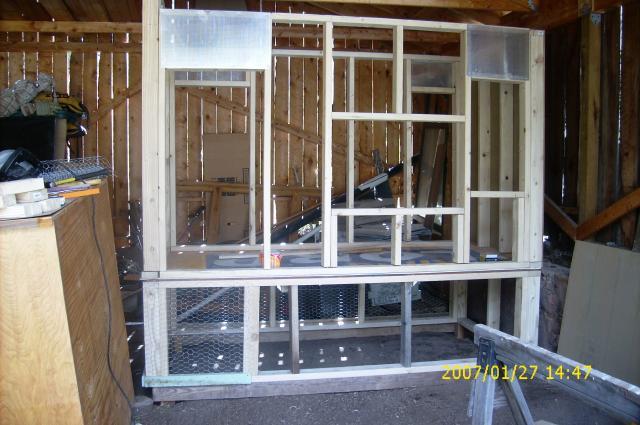
Day 3 , June 12 - With the help of Mom I framed out the 4 coop walls and stapled these perforated metal sheets over the inside of the five air vents. The metal sheets were left over from the cabinet doors of an grill enclosure/outdoor kitchen that we had installed earlier this summer. I snatched the leftovers out of the trash pile and put them aside with this in mind.
Day 4 - 9, Not much forward motion on the coop. I think I got one or two wall frames up and nailed in place, forcefully recruiting my 17 year old son to help me carry the heavy stuff and hold it until it could be fastened in place but during that time period the chicks arrived and I had a quarterly Board Of Directors meeting and didn't get much done.
Day 10 - the coop is fully framed and I'm starting the think that I'm going to get it done in PLENTY of time.
Days 11 - 24, July 3, Progress is spotty but there is progress. I get the cedar siding put up. This takes more time than you'd think because all the siding is what was leftover from when my mom's house was built and most of it was left-over for a reason (cracks, big knotholes etc.) so I have to pick through it and figure out which parts of which boards are usable, in some cases using only a few feet of a 12' board and having to pitch the rest. Even so, I ran out of siding before I was fully done so the top foot or so of both long sides of the coop are covered with this other siding that was leftover from the kids tree-house. About this time I have to go out and invest in some more nails and screws.
Day 25 - July 4th, So what if it's Independence Day, work continues on the coop. I build and install the egg door using a piece of the tree-house siding which is about an inch larger than the egg door opening on all sides with a piece of 1/2" rigid insulation that is cut to the size of the opening itself. It is my hope that this will create a draft free egg door. The hinges of the egg door as well as the barrel latches that hold it shut were purchased used at the ReStore (Habitat for Humanity's thrift store). I create a pop door using the same basic plan and get it hung as well.
Days 26 - 28, not much happens
Day 29 - July 8, Jennifer came back and we got the 6'X9' fun framed and began stapling up chicken wire. (Yeah I know, not adequate protection, I learned that later)
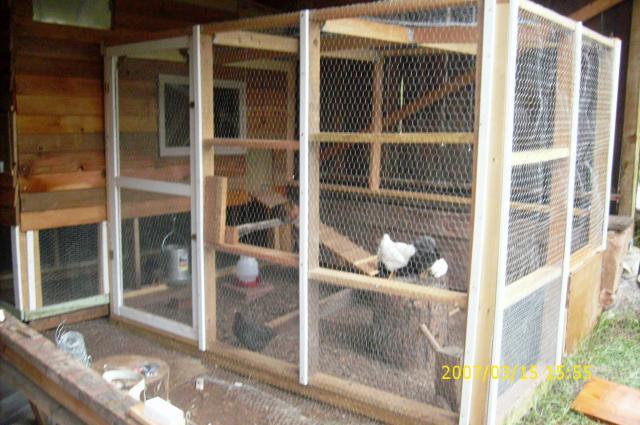
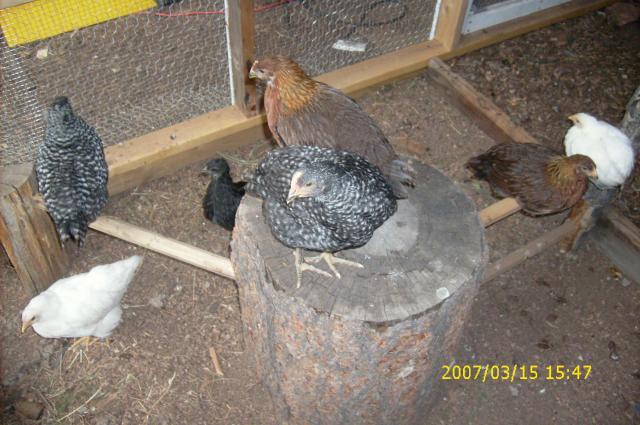
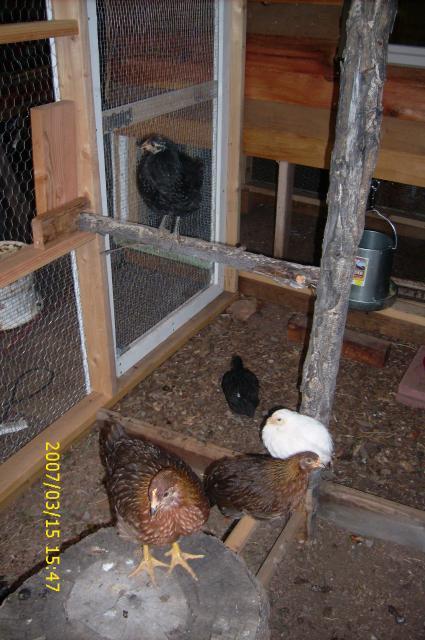
Day 30 - OK lets cut to July 28th. The run is finished (almost) and the girls have spent a few afternoons out there while I'm still finishing the coop. I put in some nifty perch structures from slices of a tree we had to take down, a dead aspen tree and a bunch of these 1 1/2" diameter dowel things that were part of a wine storage system that we don't use any more.
I've also put an easily washed floor on the bottom of the coop (a 4'X6' corrugated plastic campaign sign that I used when I ran for local office in 2006) insulated the coop (had some left-over supplies but had to buy more, now have more leftover insulation than when I started). I've paneled the inside of the coop with a variety of building supplies from grill enclosure, house addition and who knows what else. I've installed a picture window in the front, also leftover from our house addition, hung a human-sized door that I cut down from a door that was stuffed back at the back of the old garage building for at least 12 years. I've also build three laying boxes out of dresser drawers that I got from ReStore for $.50 each.But the clock is ticking, we have to get the chickens out of our garage and into the coop this coming weekend.
Day 51 is spent putting hardware on the door to the coop and the door to the run. I also built what I think is a very clever roost and poop-slide apparatus (see photo of chickens admiring poop-slide).
Due to the nasty stories I'd read on this forum about raccoons dragging chicken parts through chicken wire and eating them piece by piece, I went back to the hardware store and purchased hardware cloth, which I fastened over the lower part of the chicken run, including all the way around part that is under the coop, creating a 18" skirt to deter digging predators.
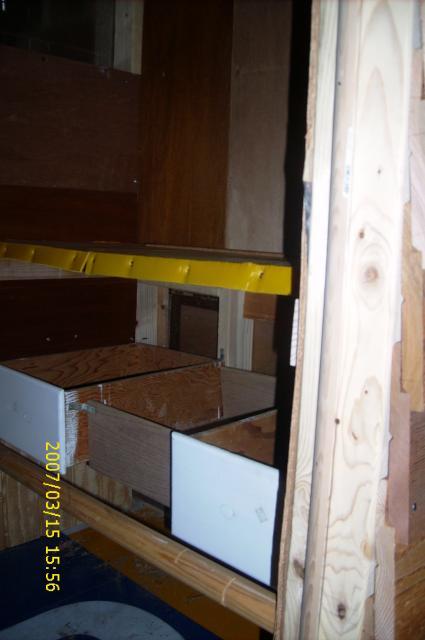
I installed a wide shelf over the laying boxes so that they wouldn't get pooped into and covered that shelf with more corrugated plastic campaign sign material, vacuumed out the coop and put down pine shavings.
The chickens spent their first night in the coop last night (July 30th) and came through the experience in good shape. Now I need a vacation.
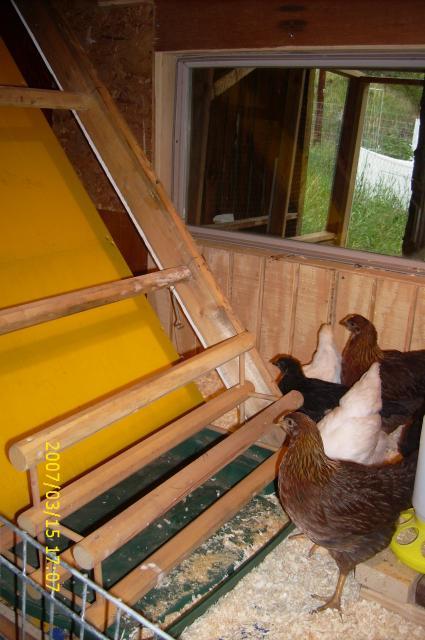
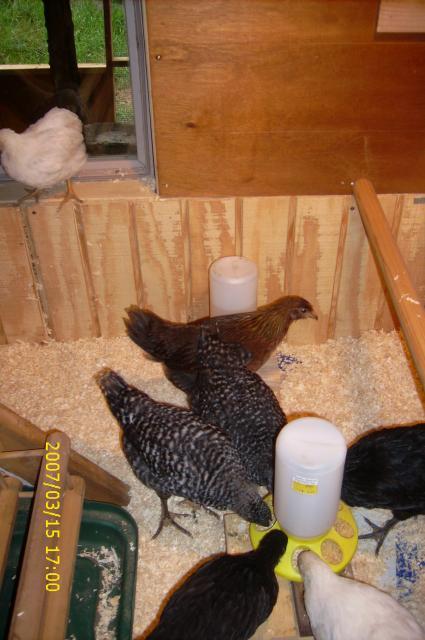
Chickens checking out new coop
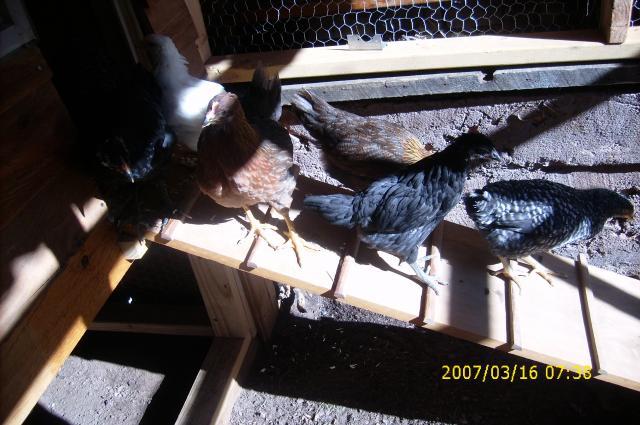
Chickens navigating the exit ramp on their first morning out of the coop.
By the way, sorry about the incorrect date-stamps on those photos, I've learned to use all sorts of power tools but can't seem to figure out how to change the date on the digital camera.

My husband's main condition of me ordering chickens was that he wasn't going to have to do anything or be responsible for any of their care, so I spoke with my mom (next-door-neighbor) and she excitedly agreed that two of the chickens would be hers and she would contribute the cost of 2 chicks plus an appropriate percentage of the food as well as help with building the coop and caring for the chickens if I were away from home. My daughter also agreed to help with their care and coop building. I enlisted an additional partner, my friend Jennifer who not only is interested in organic, eggs from happy local chickens but also knew how to use power tools. She'll contribute the cost of 2 chicks and their feed as well and be a back-up chicken keeper in the rare cases where my family and my mom would be away over the same time period.
So - Day 1, June 10th - I spent a big chunk of the day cleaning out space in this big garage structure we have on the property between my house and my mom's house. It has a great roof, three sides that are made of rough pine and therefor drafty and an open front that faces South East. I also stopped by the local lumber yard and picked up a bunch of 2"X4"s.
Day 2, June 11th - Jennifer arrives and Mom comes over and we put together the 24" high base that would support the coop. We created the 4'X8' foundation out of pressure treated 2"X4"s reinforced in each corner with a piece of 4"X4" cedar that I had left over from some raised planter beds I'd made the year before. The floor of the coop was a 4'X8' plywood political candidate sign that I had leftover from the 2010 US Senatorial elections. After the foundation was dug down and leveled, my daughter helped me staple 24" chicken wire around the bottom of the base. and the base was lifted on top and screwed down. So far, all of the nails and screws are also leftovers from other projects.
Day 3 , June 12 - With the help of Mom I framed out the 4 coop walls and stapled these perforated metal sheets over the inside of the five air vents. The metal sheets were left over from the cabinet doors of an grill enclosure/outdoor kitchen that we had installed earlier this summer. I snatched the leftovers out of the trash pile and put them aside with this in mind.
Day 4 - 9, Not much forward motion on the coop. I think I got one or two wall frames up and nailed in place, forcefully recruiting my 17 year old son to help me carry the heavy stuff and hold it until it could be fastened in place but during that time period the chicks arrived and I had a quarterly Board Of Directors meeting and didn't get much done.
Day 10 - the coop is fully framed and I'm starting the think that I'm going to get it done in PLENTY of time.
Days 11 - 24, July 3, Progress is spotty but there is progress. I get the cedar siding put up. This takes more time than you'd think because all the siding is what was leftover from when my mom's house was built and most of it was left-over for a reason (cracks, big knotholes etc.) so I have to pick through it and figure out which parts of which boards are usable, in some cases using only a few feet of a 12' board and having to pitch the rest. Even so, I ran out of siding before I was fully done so the top foot or so of both long sides of the coop are covered with this other siding that was leftover from the kids tree-house. About this time I have to go out and invest in some more nails and screws.
Day 25 - July 4th, So what if it's Independence Day, work continues on the coop. I build and install the egg door using a piece of the tree-house siding which is about an inch larger than the egg door opening on all sides with a piece of 1/2" rigid insulation that is cut to the size of the opening itself. It is my hope that this will create a draft free egg door. The hinges of the egg door as well as the barrel latches that hold it shut were purchased used at the ReStore (Habitat for Humanity's thrift store). I create a pop door using the same basic plan and get it hung as well.
Days 26 - 28, not much happens
Day 29 - July 8, Jennifer came back and we got the 6'X9' fun framed and began stapling up chicken wire. (Yeah I know, not adequate protection, I learned that later)
Day 30 - OK lets cut to July 28th. The run is finished (almost) and the girls have spent a few afternoons out there while I'm still finishing the coop. I put in some nifty perch structures from slices of a tree we had to take down, a dead aspen tree and a bunch of these 1 1/2" diameter dowel things that were part of a wine storage system that we don't use any more.
I've also put an easily washed floor on the bottom of the coop (a 4'X6' corrugated plastic campaign sign that I used when I ran for local office in 2006) insulated the coop (had some left-over supplies but had to buy more, now have more leftover insulation than when I started). I've paneled the inside of the coop with a variety of building supplies from grill enclosure, house addition and who knows what else. I've installed a picture window in the front, also leftover from our house addition, hung a human-sized door that I cut down from a door that was stuffed back at the back of the old garage building for at least 12 years. I've also build three laying boxes out of dresser drawers that I got from ReStore for $.50 each.But the clock is ticking, we have to get the chickens out of our garage and into the coop this coming weekend.
Day 51 is spent putting hardware on the door to the coop and the door to the run. I also built what I think is a very clever roost and poop-slide apparatus (see photo of chickens admiring poop-slide).
Due to the nasty stories I'd read on this forum about raccoons dragging chicken parts through chicken wire and eating them piece by piece, I went back to the hardware store and purchased hardware cloth, which I fastened over the lower part of the chicken run, including all the way around part that is under the coop, creating a 18" skirt to deter digging predators.
I installed a wide shelf over the laying boxes so that they wouldn't get pooped into and covered that shelf with more corrugated plastic campaign sign material, vacuumed out the coop and put down pine shavings.
The chickens spent their first night in the coop last night (July 30th) and came through the experience in good shape. Now I need a vacation.
Chickens checking out new coop
Chickens navigating the exit ramp on their first morning out of the coop.
By the way, sorry about the incorrect date-stamps on those photos, I've learned to use all sorts of power tools but can't seem to figure out how to change the date on the digital camera.
Last edited: