Hi All,
Finally getting around to posting pics of my pallet coop build. Keep in mind that this build has been an ongoing project dating back to when I first got my flock a couple years ago. First I made a 'temporary'
 coop out of a tile packing crate,,,you may see a pic or two of that coop mixed in somewhere. Then I started building their real coop, but, as they say....life got in the way a bit. Three abdominal surgeries have stretched out my coop project a bit. Now I'm in the home stretch and have enough done to post some pictures, it will also help keep me on task to finish up the details that remain.
A couple points on my coop design, for the construction method I purchased a plan (about 20 bucks) off the internet when I googled "pallet coop plans". I didn't follow the plan exactly but that is the beauty of his method, its more of a construction method than an exact floor plan. Another goal I had was to build as cheaply as possible. My Dad, who passed away some years ago, was a master at building more with less. I wanted to sort of honor him in my mind and heart, by building in a way he would have appreciated....something nice but with as many found and free materials as possible. I will try and tally up cost as I go along with the pictures b/c I really have forgotten what I've spent....I'm guessing around 100-150 dollars.
Also just a moment to talk about using pallets. When researching pallet coops, you will see two main types. Those that use the pallet (whole) intact as a building block, and those that take the pallets apart and use the boards. I used the second method. You will see alot of people asking questions on how to take pallets apart in regard to method and tools, so I'll describe and show pictures of this process and tools I used. For this method try to find pallets with the longest boards possible. Now lets get started.
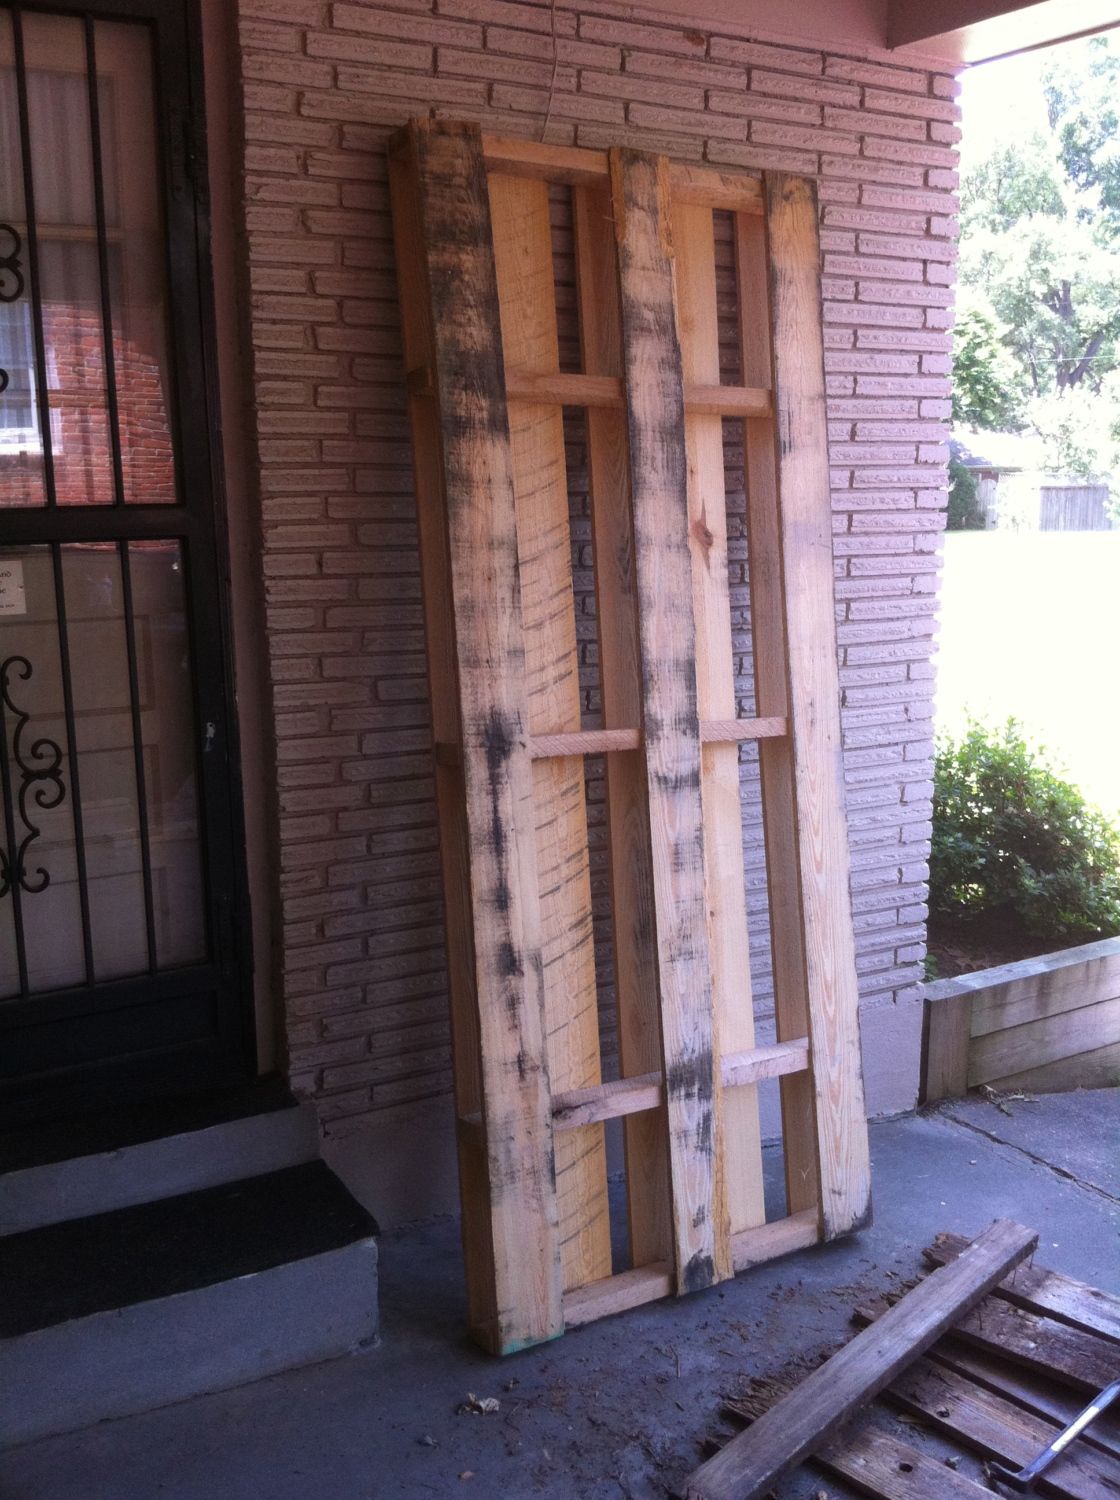
I like pallets like this because they have LONG boards, they are also held together by staples, which I find easier to dismantle. If you look in the bottom right hand corner of this first picture you'll see the type pry bar I like to use to get the boards off.
After prying them apart you end up with boards like these:

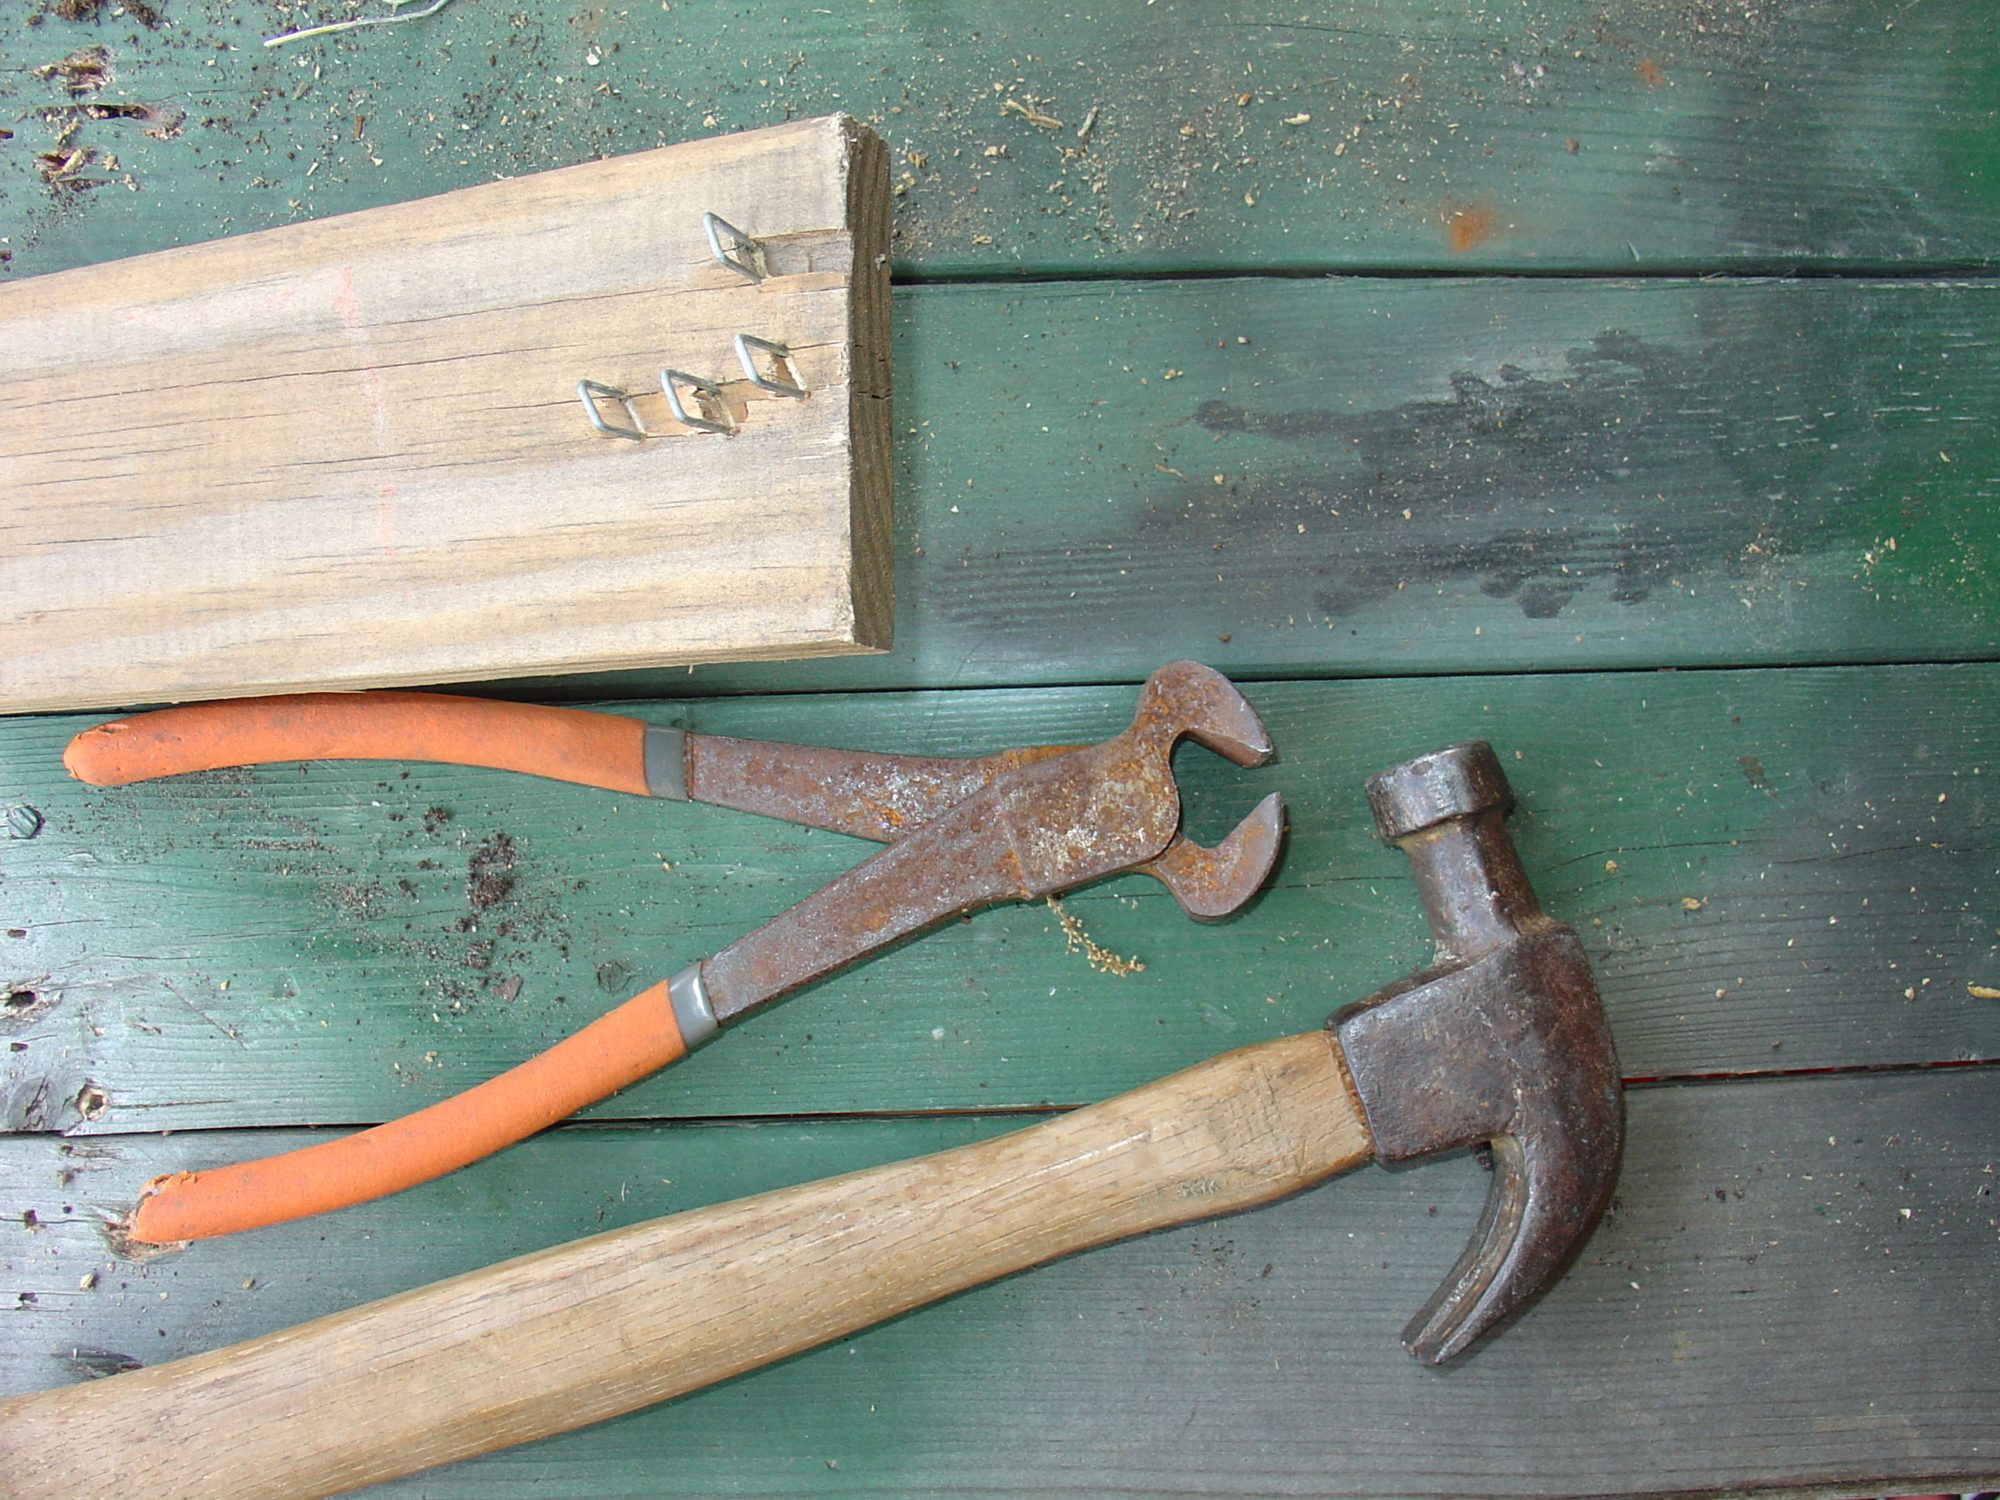
Now you have to get the staples out...here are my favorite tools for this:
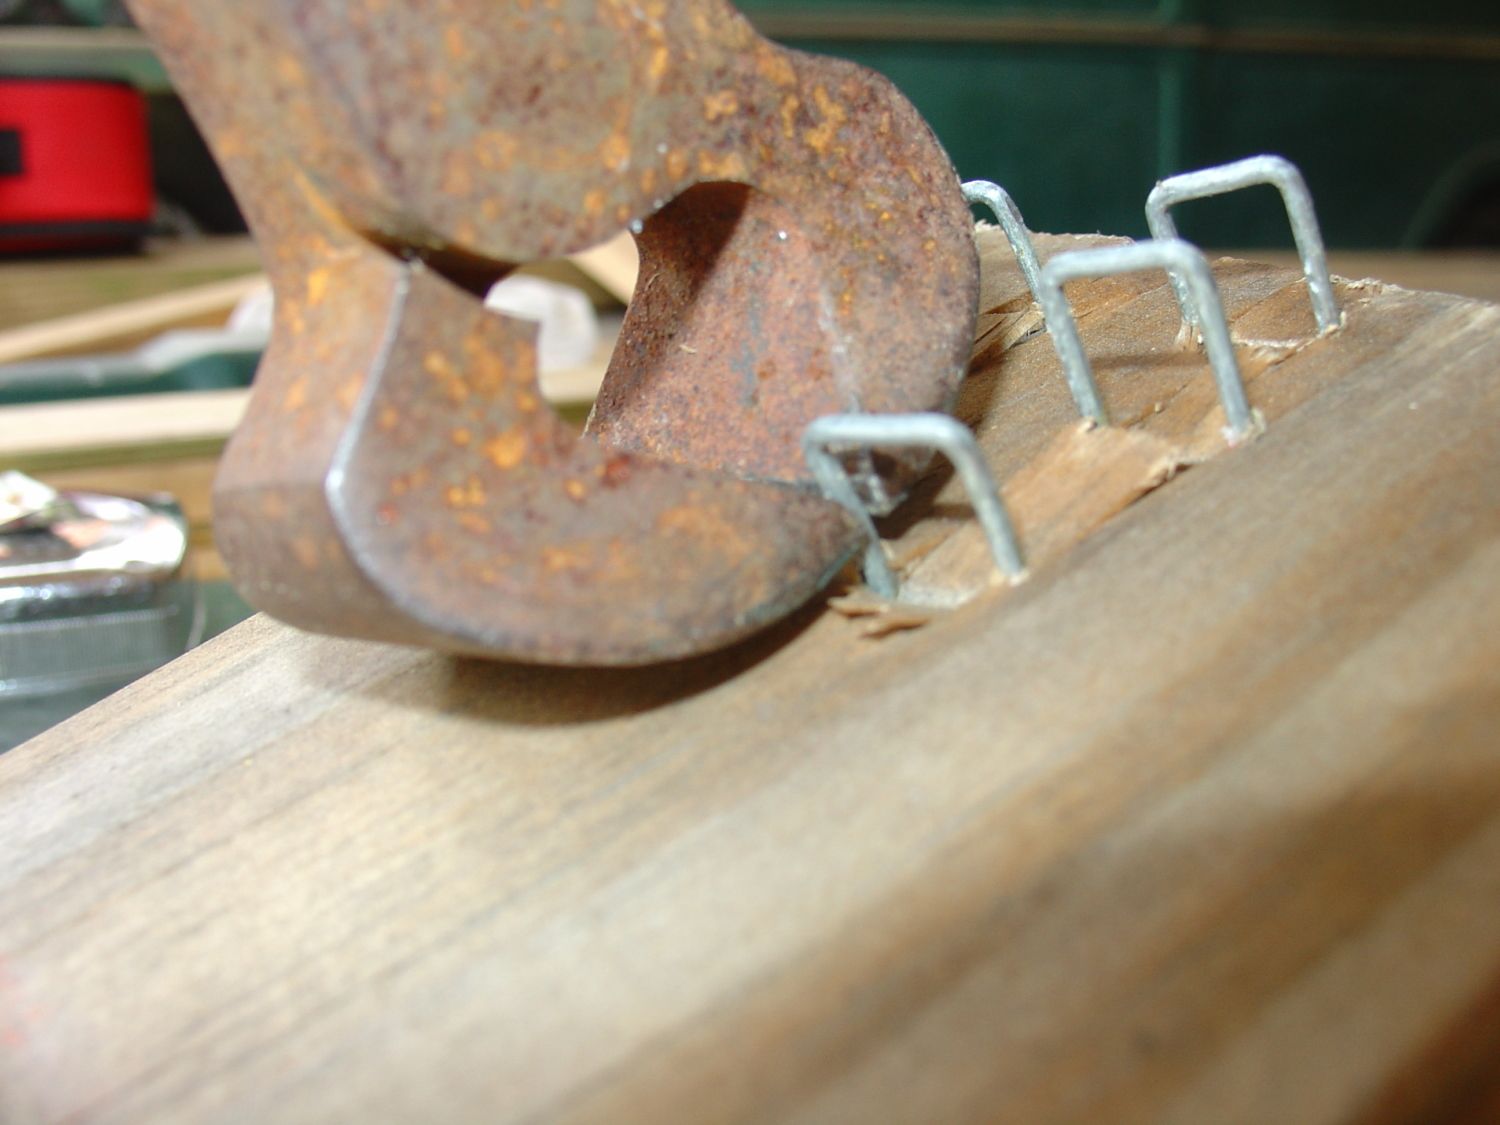
You just straighten any bent staples or nails, then pound them back through and use the nipping pliers, to pull/lever them out like this:
I don't remember exactly how many pallets I took apart but it was probably around 12-15. After you have a nice stack of boards, its time to start building. Don't throw away the other boards the 1x4's were nailed to, those boards can be used for legs, etc. All of these pallets I got for free so cost is at zero, so far.
Next post will show the construction of the coop's base.
Finally getting around to posting pics of my pallet coop build. Keep in mind that this build has been an ongoing project dating back to when I first got my flock a couple years ago. First I made a 'temporary'
A couple points on my coop design, for the construction method I purchased a plan (about 20 bucks) off the internet when I googled "pallet coop plans". I didn't follow the plan exactly but that is the beauty of his method, its more of a construction method than an exact floor plan. Another goal I had was to build as cheaply as possible. My Dad, who passed away some years ago, was a master at building more with less. I wanted to sort of honor him in my mind and heart, by building in a way he would have appreciated....something nice but with as many found and free materials as possible. I will try and tally up cost as I go along with the pictures b/c I really have forgotten what I've spent....I'm guessing around 100-150 dollars.
Also just a moment to talk about using pallets. When researching pallet coops, you will see two main types. Those that use the pallet (whole) intact as a building block, and those that take the pallets apart and use the boards. I used the second method. You will see alot of people asking questions on how to take pallets apart in regard to method and tools, so I'll describe and show pictures of this process and tools I used. For this method try to find pallets with the longest boards possible. Now lets get started.
I like pallets like this because they have LONG boards, they are also held together by staples, which I find easier to dismantle. If you look in the bottom right hand corner of this first picture you'll see the type pry bar I like to use to get the boards off.
After prying them apart you end up with boards like these:
Now you have to get the staples out...here are my favorite tools for this:
You just straighten any bent staples or nails, then pound them back through and use the nipping pliers, to pull/lever them out like this:
I don't remember exactly how many pallets I took apart but it was probably around 12-15. After you have a nice stack of boards, its time to start building. Don't throw away the other boards the 1x4's were nailed to, those boards can be used for legs, etc. All of these pallets I got for free so cost is at zero, so far.
Next post will show the construction of the coop's base.
Last edited:

")
