Parks2peaks
Chirping
- Feb 20, 2018
- 6
- 27
- 59
Hello everyone I wanted to share some pictures of our coop and some of the process of building it. First off a huge thank you to The Witchita Cabin Coop. After a quick scan of this site you will notice a ton of people have been helped out by this coop. Please check it out if you haven’t yet.
A couple of things we took into consideration before starting. We needed our coop predator proof as much as possible, as you can see in the pics it is in the woods. We mostly deal with Coyotes, Hawks, and other neighbors house cats. We also wanted a closed in run and easy cleaning.

To make the coop harder to dig under we buried cinder blocks and used hardware cloth to stop intruders coming from below.
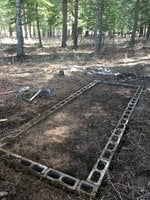
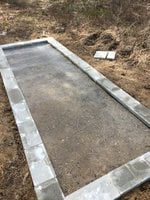
Once we had the foundation square and level we started to frame up the coop. We made the front of the coop 8ft tall to make the most out of the 2x4's.
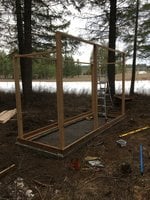
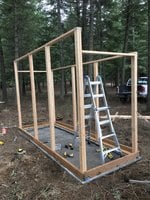

After the rough framing was complete we sandwiched the hardware cloth between another 2x4 laid flat to cover the washers and screws.
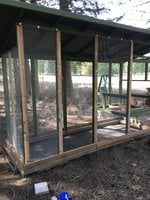
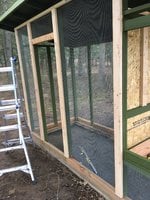
Once the hardware cloth was done we sheeted the top with 3/4 plywood and used tar paper and asphalt shingles to finish off the roof.

It was then time to close in the coop area. We used a mix of T1-11 siding and cedar plank siding that we stained and sealed. We also made a couple of windows using plexiglass glued into a 2x4 frame.
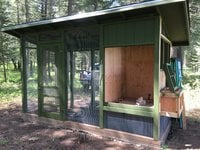
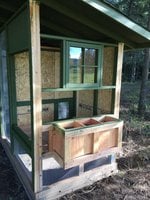
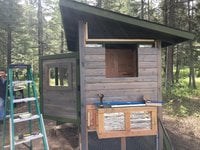

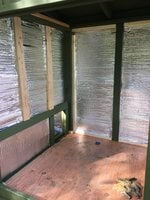
We left the top of the coop open but secured. This really allows a lot of fresh air to blow through keeping things smelling decent. Also insulation was added to all the walls of the coop to keep the girls a little warmer through the winter. We have been using 1 heat lamp mounted to the ceiling of the coop. It is single digit temperatures right now and all the girls are still laying like normal.
Next it was time to finish off the inside. First we put the door to the run on a pull string that can be opened without going into the coop or run (make sure to do this, it makes it so much easier). We sheeted the inside added some roosting bars and a ramp to help the girls get up there.
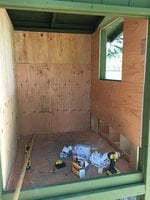
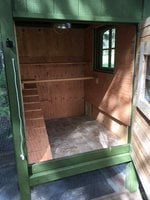
All that was left now was to finish up the siding and add a ramp into the coop from the run. We used sand in the run which has been fairly easy to keep clean and the girls like to dig in it.
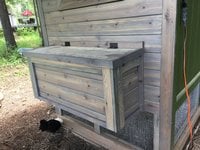
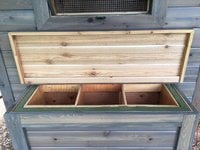
The girls seem right at home!
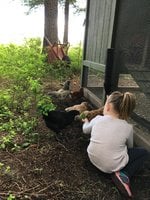
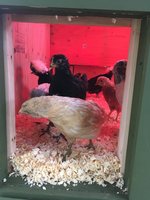
We started the coop on March 9th and completed it June 9th. This was working on the coop at least one day but usually both days of the weekend. It cost about $1500 in total. All materials were bought new except for the screen door which we already had.
A couple of things we have learned about chickens in our 10 months of having them:
- Put your coop as far as you can from your outdoor sitting areas if your going to let your hens free range. They poop everywhere and seem to be attracted to the areas you don't want them to be!
- We made a feeder out of 3" ABS plumbing pipe, this has worked great and it is nice to be able to feed your chickens once a week especially during the cold winter months!
- After a few months of full on free ranging we decided to put up a chicken wire boundary fence around the coop. They still have a lot of room to walk and search for bugs and plants and it gives us the option to let them out (where they can get on the deck and in the garage!) when we want. We usually let them out to free range the property a few hours a day. This has worked great for poop control around our house as they seem to stick to the grass areas if they are on limited time. Instead of checking out the patio furniture.
- Think about wind direction when picking your location even a cleaned coop doesn't smell great.
- My wife made a poop hammock out of left over material with a piece of scrap tarp sewed onto the top. We hung this between the two roost bars and it has made cleaning the coop much easier and less frequent. Also we put linoleum on the floors which make it so much faster to dump old cedar chips during cleaning.
A couple of pictures from today.
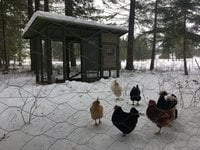
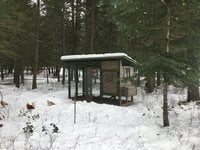
Thanks for checking out my coop! Hope it gave you some ideas for yours!

A couple of things we took into consideration before starting. We needed our coop predator proof as much as possible, as you can see in the pics it is in the woods. We mostly deal with Coyotes, Hawks, and other neighbors house cats. We also wanted a closed in run and easy cleaning.
To make the coop harder to dig under we buried cinder blocks and used hardware cloth to stop intruders coming from below.


Once we had the foundation square and level we started to frame up the coop. We made the front of the coop 8ft tall to make the most out of the 2x4's.


After the rough framing was complete we sandwiched the hardware cloth between another 2x4 laid flat to cover the washers and screws.


Once the hardware cloth was done we sheeted the top with 3/4 plywood and used tar paper and asphalt shingles to finish off the roof.
It was then time to close in the coop area. We used a mix of T1-11 siding and cedar plank siding that we stained and sealed. We also made a couple of windows using plexiglass glued into a 2x4 frame.


We left the top of the coop open but secured. This really allows a lot of fresh air to blow through keeping things smelling decent. Also insulation was added to all the walls of the coop to keep the girls a little warmer through the winter. We have been using 1 heat lamp mounted to the ceiling of the coop. It is single digit temperatures right now and all the girls are still laying like normal.
Next it was time to finish off the inside. First we put the door to the run on a pull string that can be opened without going into the coop or run (make sure to do this, it makes it so much easier). We sheeted the inside added some roosting bars and a ramp to help the girls get up there.


All that was left now was to finish up the siding and add a ramp into the coop from the run. We used sand in the run which has been fairly easy to keep clean and the girls like to dig in it.


The girls seem right at home!


We started the coop on March 9th and completed it June 9th. This was working on the coop at least one day but usually both days of the weekend. It cost about $1500 in total. All materials were bought new except for the screen door which we already had.
A couple of things we have learned about chickens in our 10 months of having them:
- Put your coop as far as you can from your outdoor sitting areas if your going to let your hens free range. They poop everywhere and seem to be attracted to the areas you don't want them to be!
- We made a feeder out of 3" ABS plumbing pipe, this has worked great and it is nice to be able to feed your chickens once a week especially during the cold winter months!
- After a few months of full on free ranging we decided to put up a chicken wire boundary fence around the coop. They still have a lot of room to walk and search for bugs and plants and it gives us the option to let them out (where they can get on the deck and in the garage!) when we want. We usually let them out to free range the property a few hours a day. This has worked great for poop control around our house as they seem to stick to the grass areas if they are on limited time. Instead of checking out the patio furniture.
- Think about wind direction when picking your location even a cleaned coop doesn't smell great.
- My wife made a poop hammock out of left over material with a piece of scrap tarp sewed onto the top. We hung this between the two roost bars and it has made cleaning the coop much easier and less frequent. Also we put linoleum on the floors which make it so much faster to dump old cedar chips during cleaning.
A couple of pictures from today.


Thanks for checking out my coop! Hope it gave you some ideas for yours!


