Chain link Panels for chicken runs - coop set up & Ideas

ChicKat

Free Ranging
11 Years
In this thread you can see the evolution and growth of a chicken operation.

The very start was 7 panels that were given to me by a man who once used them as housing for his daughter's rabbit.

Over the years, additions, configuration ideas, things learned...and the evolution of the chicken pens resulted in what has been a very useful and for the most part safe and cool environment for my chickens.
Here's one picture:
700

2014

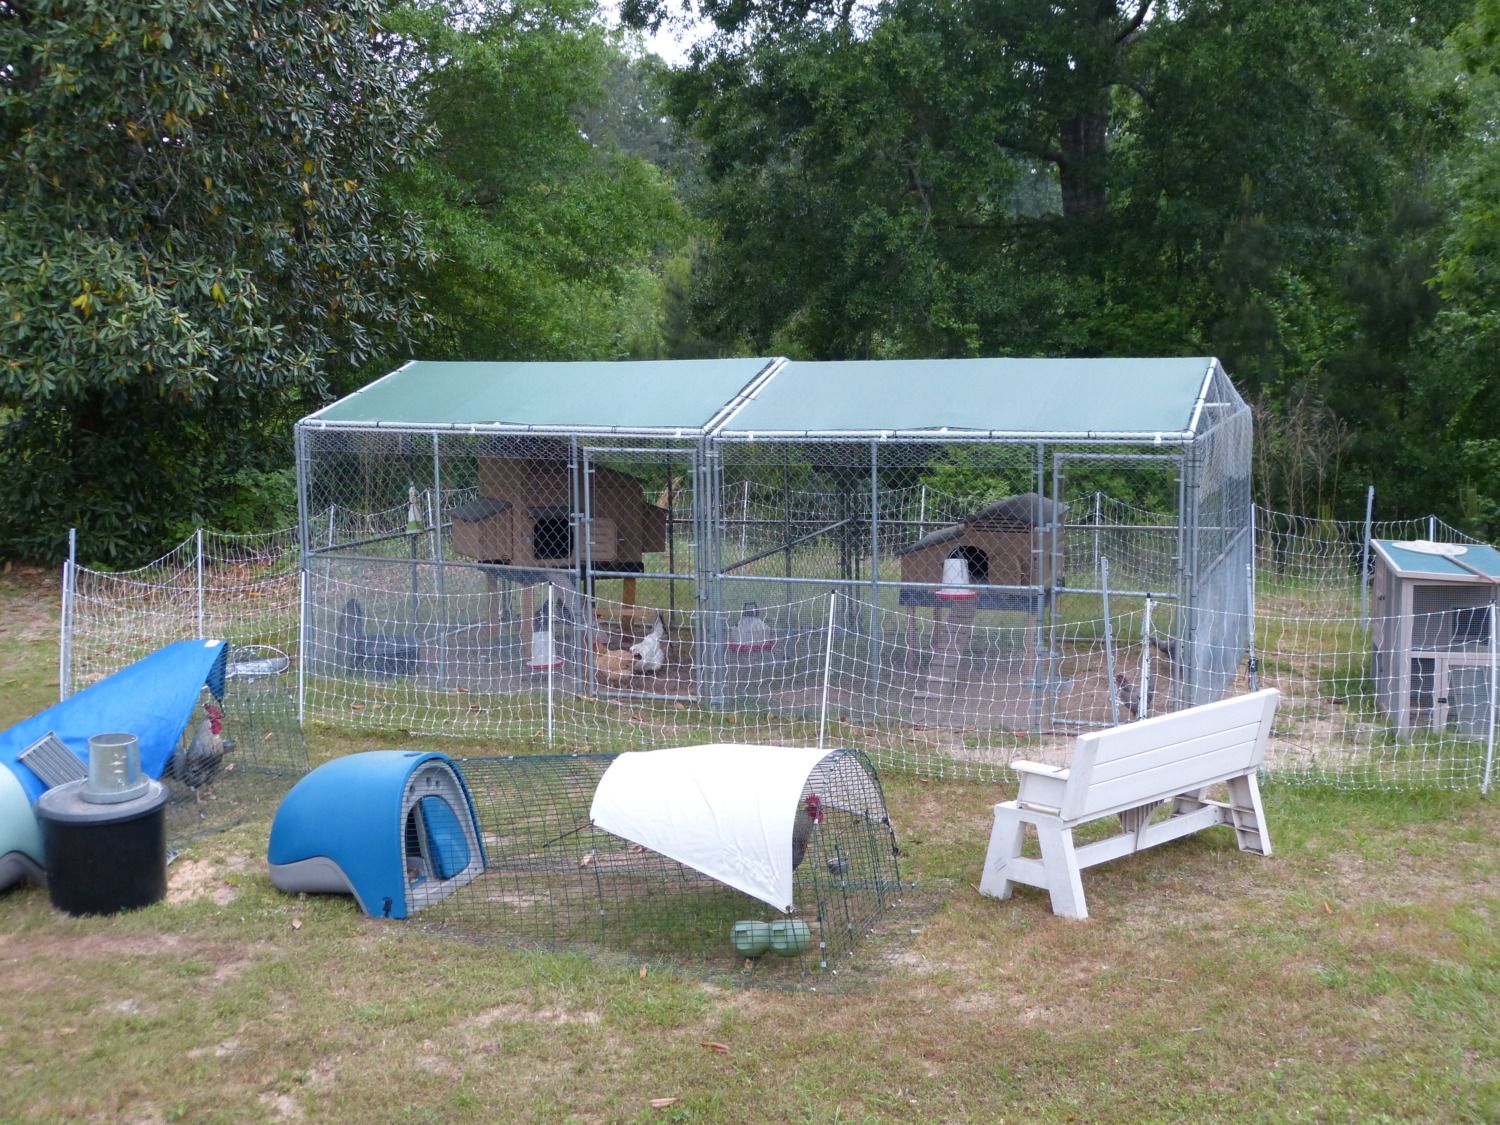
ahhh to travel back in time, two simple 10x10 pens with roofs, and Snap N lock chicken houses safely tucked inside. That was the 2014 set up.
Even prior to that the panels were located on a ranch in the Texas Hill country -- not the Pineywoods where they are now.
Here is the very first setup. You will instantly notice there are no roofs:
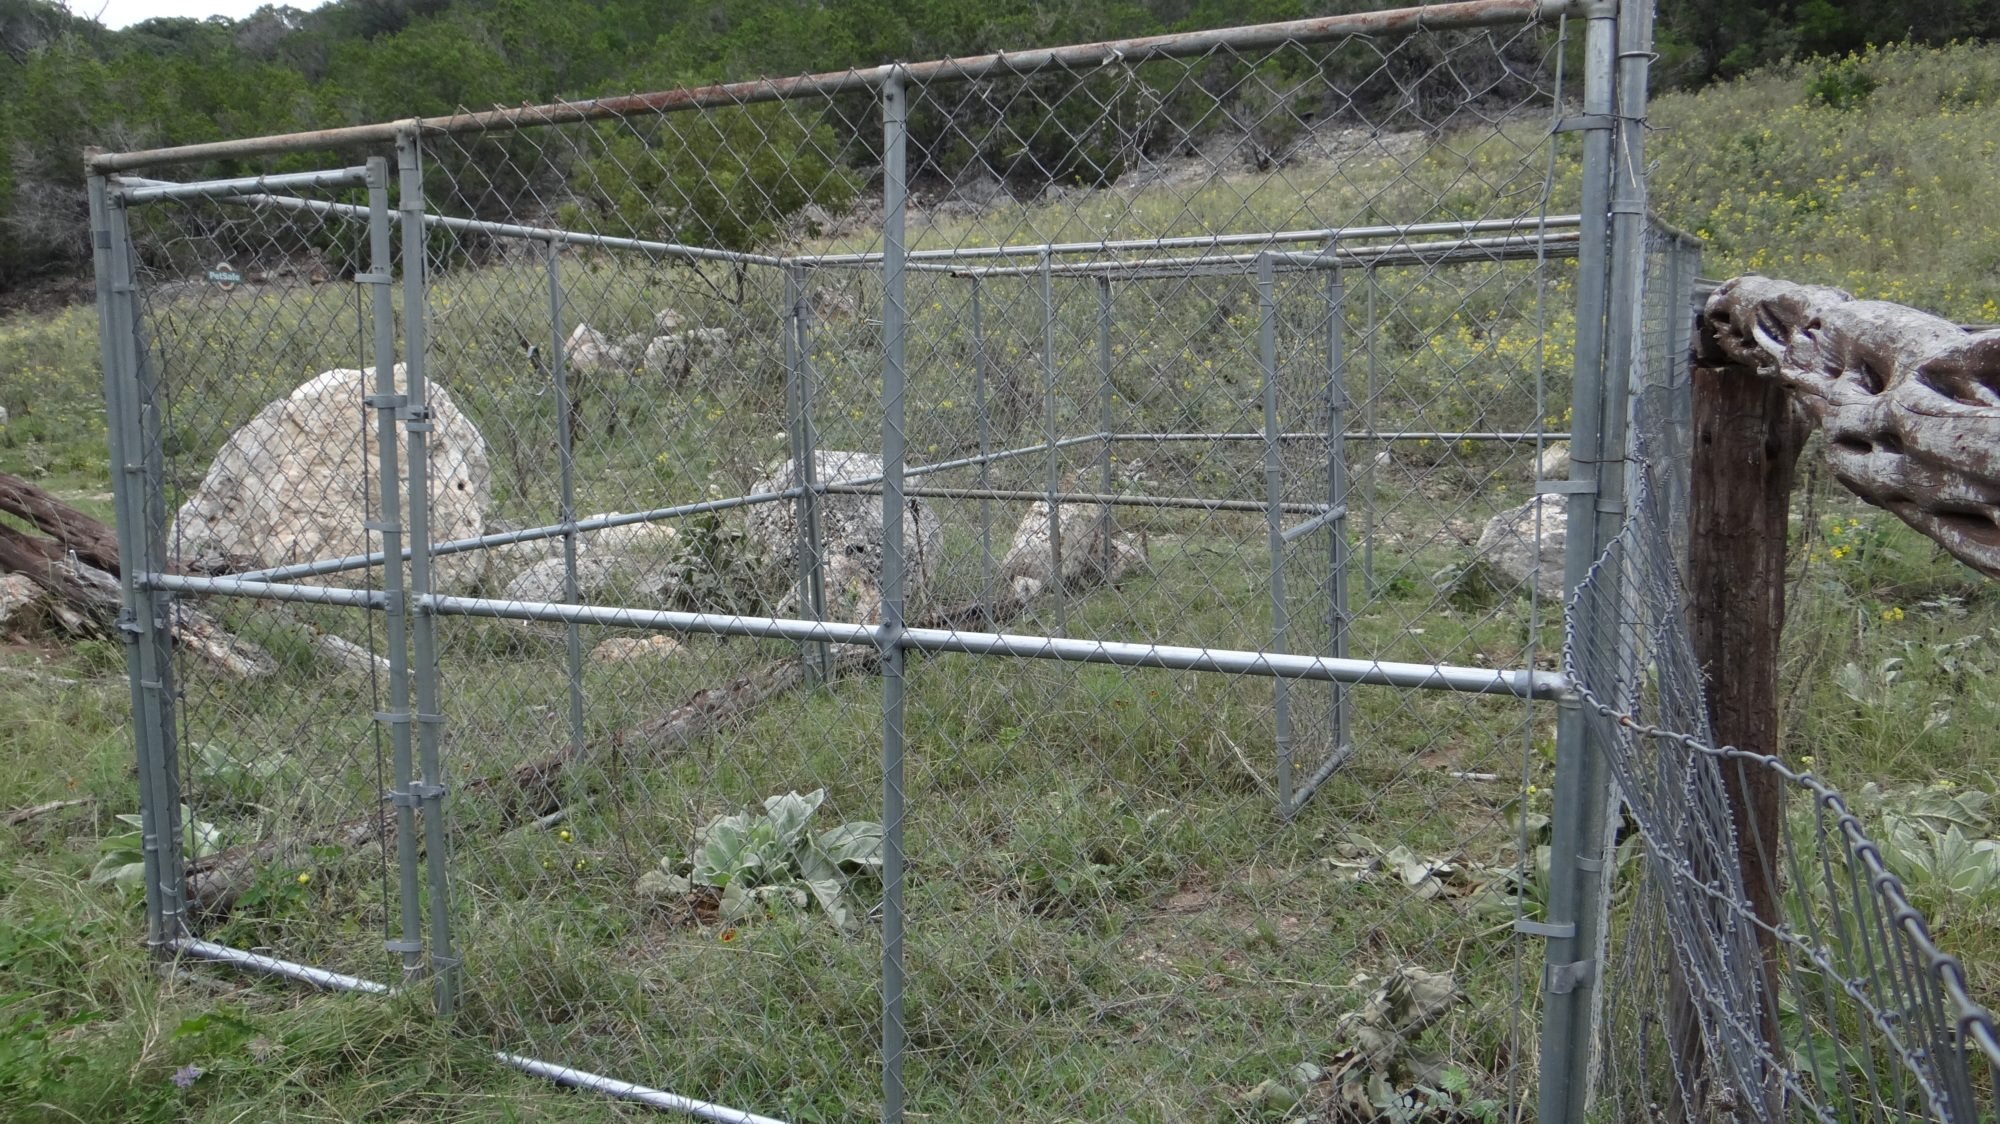
5990662

2013
====================================================
First point: 10' long by 6' tall panels are bolted together using a wrench. the panels are fairly easy to transport,
Second point: it's essential to have a 'roof' over the top. A). Chickens are kept in, B). Predators are kept out, and C). most important in this climate, shade is always available to the chickens as well as protection from rain for the feed.


In the Pineywoods set up -- we placed the pens in the area of the backyard that had the best grass. It seems the best grass was there because a giant Magnolia tree provided afternoon shade. In the hottest weather the shade of the tree, even on the tarp roofs is a factor in the temperatures that the chicksens face and hence their survival.
 
Last edited:
The highly configurable set up -- evolved from the 10' x 20' original configuration of two 10' x 10' pens, made from 7 panels -- to the larger more functional set up that now has a foot print of 20' x 40' and contains a courtyard/entrance area. The following pictures show a pen on each end that is 10' x 20', and two pens that are 10' x 10' behind the courtyard area where doors from both 10x10 pens open and one of the 10x20 pens opens to give the residents a chance to have more space, and to access grass, while still being protected by 6' high chain link fence.
P1070609.JPG

2018
P1070614.JPG
2018
 
Above, the toothpicks represent each individual chain link panel. Here's an even more descriptive example.
p1070621-jpg.1529446

To decode the above, all you have to do is realize that the black marks on the tooth picks represent doors to the various pens.
I didn't read everything......but just had to say I LOVE THIS!!
As an old drafter, proportional layouts are most important when planning spaces,
and this is a brilliant way to represent your panels and doors.
 
***UPDATE****

It looks like the sale has fallen through - due to tight money and extra overtime, the buyers don't have time to dismantle the pens and don't have the money they thought they would have, so it seems.

Therefore, these pens will go on auction in the BYC - buy-sell-trade.

In anticipation of the sale, we started to dismantle, and have taken down the Hardware Cloth Skirting around the exteriors and interiors and attached to some doors. (Some doors never had Hardware Cloth attached.) -- Also to give a jump start to the buyers who I thought were going to show up the next day, I removed roof tarps. Amazing how those green tarps are still in very good shape. Other tarps faced more sun, and have been replaced a number of times with silver tarps from Wal*Mart. Readily available.

Here's the state of the pens as of today.
P1070856.JPG


P1070857.JPG


P1070858.JPG

These are the rolls of hardware cloth. Taking them off was really time consuming because they were perfectly attached with zillions of zip ties. The guy who originally did it was so thorough and talented!! It was over 2-hours to clip and remove all the zip ties. Some hardware cloth remains to be removed around the last 10 x 20 pen, because there were chickens still there at that time. Now they have been rehomed.
P1070859.JPG

These are uncut -chainlink fence horizontal poles. I was going to put them over the "courtyard" part of the pens. They would probably need to be trimmed. And was going to stretch bird netting over the 10 x 20 courtyard to deter hawks. I did have a hawk enter pens via the courtyard at one time and kill a hen. Never installed the barrier. Poles and bird netting go to the buyer.
It's a pretty big job to dismantle -- but value for the work.
Look at buy-sell-trade -- as soon as I get it posted -

I'm thinking everything could probably fit into a you-haul truck. Another option, I do have someone who has a big flat-bed trailer....but I"m not sure how many panels (stacked how high) could safely travel, buyer would have to make arrangements with him, or with their own hauler.

Let me know if any questions if you have interest in being the buyer. I think I will start bidding at $1,000 for lock stock and barrel.

OH-- I'm located in Woodville. About 50-minutes north of Beaumont TX and about 45 minutes South of Lufkin. About an hour and 15 minutes north and east of Houston airport.
:frow
 
Actually, I'm going to put it on BYC buy-sell-trade to auction it off....so this thread is to tell the details to anyone interested in buying it, as well as some of the pros and cons I've learned over the years of having chain link chicken runs with little houses inside. :O)

Figuring I could accomplish two things at one time.
 
Doesn't time go by fast? sheesh.

Now it is time to talk about the ROOFs.
Under all the roofs are structures made from pipes. Next those are covered in chicken wire, and on top of the chicken wire are tarps.

Presently there are two 10x10 green tarps on the 10x20 chainlink run closest to the house, then on the two 10x10 runs, one 10x20 tarp covers them, and lastly on the far end, there is one 10x20 tarp.

The chicken wire roofing support extends down over the peak of the roof, and over what would be gaps in the area above the doors. This has not been an entry point for any unwanted critters in the 4+ years that the coops have stood in the same location.
P1070651.JPG

P1070652.JPG

This is the box that the roof 'skeleton' comes in. (Writing on box designates that the electric poultry netting traveled here during a move. Good box to package up poultry netting).
In the far chicken run, we 'improvised' and rather than use their shorter poles, we used the angle hardware and steel tubes from chain link fence supply to double the length.
We made a center roof support in that pen using a pipe/tube on a concrete paver block.
P1070568.JPG

you can see the roof configuration and the center pole just on the other side of this coop.
P1070576.JPG

Just about the same picture. different day different time of day.
P1070484.JPG

took this picture with the door closed, because a snake was in the nest box, and there was no ramp -- was trying to figure out how the snake crawled IN. Gives a good view of the center support pole, though doesn't it? ;o)

A couple other views I have of the insides are on video. Once I left the doors open and a hawk followed a hen in and killed the hen, but then couldn't find its way out. Once I figure how to attach, although it is of the hawk, it shows the interior of the roof.

So, Sixth Point:
Tarp over chicken wire, over steel structure makes a good roof. The tarps need to be replaced from time to time.
For the court yard, I purchased chain link fence rails/tube/pipe -- what ever you call it, a special saw blade to cut the steel with my 'sawzAll' - and aviary netting that would prevent or at least slow down predator invasion. Even snakes can't crawl through that aviary netting. --
The extra pipes & Aviary netting will go with the pens.

In addition to providing things I've learned and my experience from my set up -- This is a LOT of detail to support the sale of these pens. There's a lot here that will be going.
It will have to be disassembled, and hauled away. A big job -- but do-able. If I were to haul it, I would probably rent a U-haul, but a flat bed trailer might work...there are a LOT of panels here, pipes, tarps, hardware cloth, chicken wire etc. If you are driving distance from Woodville, TX - and want to buy these pens, I will put them up for auction on the Buy-Sell-Trade here at BYC in a few days. Also will post more - and answer any questions that come my way about this set up
 
I didn't read everything......but just had to say I LOVE THIS!!
As an old drafter, proportional layouts are most important when planning spaces,
and this is a brilliant way to represent your panels and doors.
Thanks aart, :bow

Since it is reconfigurable -- it really helps. Especially for visual or kinesthetic learners.
 
No, but he did make a center support that I was interested in asking more about. If we put two or three of those in we might have been ok.
Yes, I agree that the span for a roof will need to be supported. Here are a couple ways that mine is different.
1. steel tubing is made into frames for the roofs, and they have regular chicken wire reinforcing the blank space inside the frames. So my roof is probably lighter than the roof you are holding up.
2. There are roof angle reinforcing joints on the gable ends and inside.
3. interior supports are held tightly at the correct angle of the roof, using hardware that is used in building chain-link fences - These came from Lowes.
4. yes, you are right -- I have a center pole in one of the 10x20 which is a pole (again from Lowe's in the fence-building section) that we sawed to the height needed and then placed on a concrete paver.

Here are pictures:
P1070763.JPG

can you see right at the roof peak?
P1070762.JPG

same roof peak a little farther away.
P1070764.JPG

The inside view under the tarp of that roof peak.
P1070765.JPG

Here is a join we made on the inside, with fence hardware and mimiced the same angle as the roof. the zip-ties are holding the chicken-wire to the poles.
P1070766.JPG

Here is the attachment to the side walls which are upright -- You can see attachment of roof, and then attachment of pole to the side wall and this part of the tarp is held with bungee cords over the chicken wire that holds the tarp up. Most bungees are now replaced with zip ties.
P1070767.JPG

This 4-way pipe joint is from the kit, and it is in the exact center of one of the 10x20, however, the other 10x20 has no center support. Instead it relies on two roof kits. This one has only 1 roof kit with chain link fence poles to extend it beyond it's intended 10x10. The other one uses two 10x10. Fence pole is just sitting under this and held by gravity.
P1070768.JPG

Here is the base of that pole, you can see the concrete paver is partly/mostly covered by dirt in the coop.
P1070124.JPG

Snow is fairly rare here, and pretty light, as shown in this picture. You can also see the nearer 10x20 has a gap in the exact center. ETA due to two roof kits instead of one that was modified. No center support in that pen.
P1070652.JPG

Here is a photo from the roof kit box-- I got mine at TSC.

HTH -- let me know if I can help or if there are any other questions. Sorry that snow caused you grief.
 
Last edited:

New posts New threads Active threads

Back
Top Bottom