Incubating Emu Eggs

Perhaps you have been contemplating adding emus to your farm and have decided you want to hatch them yourself. Or maybe you bought some chicks a few years ago, and they're grown up and laying eggs of their own you would like to hatch. Maybe you even bought an adult pair, intending to breed them. Whichever the case, this article will help you with hatching their eggs.
Choosing an Incubator
Before you can incubate the eggs, you will of course need an incubator for them. This provides more of a challenge with emu eggs, because they are so large. Most incubators made for chicken eggs simply will not fit them. However, there are definitely some options out there.
Cabinet Incubators
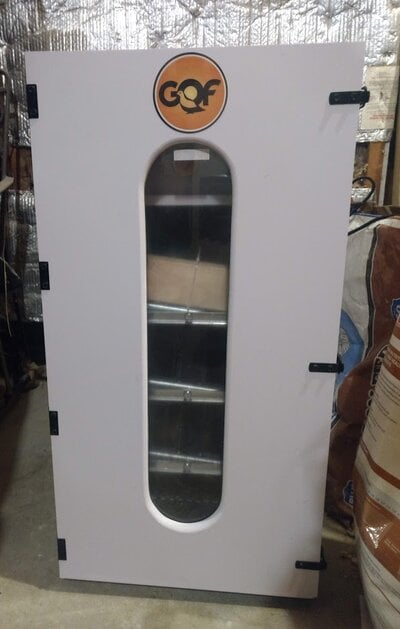
Cabinet incubators are the best choice for emu eggs. They are large, so they easily fit the eggs, and can hold far more of them than most other incubators will. And, best of all, the auto-turn feature will work for emu eggs, meaning that unlike with most other incubator choices, you will not have to hand turn the eggs multiple times a day because the incubator can do it for you. Cabinets are the best choice for anyone who plans on doing a lot of emu eggs, such as if you have your own breeding pair, or maybe you're just hatching a few eggs now but plan to raise the chicks up for breeding and will need to hatch their eggs down the line too.
There are several choices for cabinet incubators. I personally use a GQF Sportsman 1502. A lot of people use Redwoods or Dickey's, or if you really want a big one, you can get a Natureform, though that's going to cost you! But they do make one that is specifically for ratite eggs.
Depending on what cabinet you choose, you will likely also have to purchase the correct trays to use for emu eggs, so keep that in mind when figuring your budget.
Tabletop Incubators
Tabletop incubators are smaller, usually designed for hatching smaller amounts of eggs from birds like chickens. Some of them, though, can fit a couple emu eggs in them.
*** Brinsea Tabletops ***
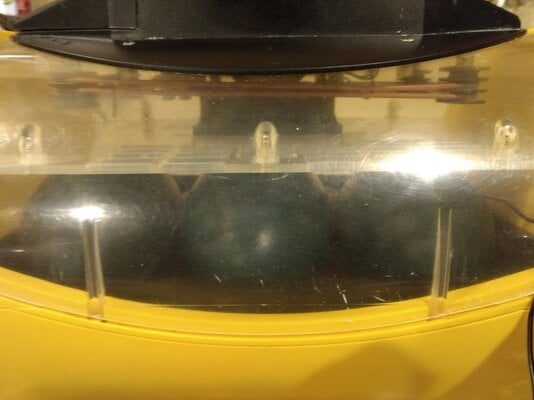
Brinsea Octagon incubators can fit some emu eggs in them. I myself have incubated eggs in them when I was first starting with emus. The Eco 20 can hold three eggs, and the Eco 40 can hold four to six. You have to put them in such that you can't rock the incubator back and forth for turning as it's designed, though, meaning you'll be hand turning your eggs. You CAN put the eggs in there in the correct orientation so that you can rock the incubator onto its sides for turning, but that means you're not going to be fitting as many eggs in.
These incubators are excellent, holding temperatures well and allowing for easier turning if you sacrifice egg capacity. For those reasons, they are good choice of a smaller incubator to hatch emus in.
However, they are no longer made, since Brinsea has gone to a different design for their tabletop models now, making them hard to find. Larger emu eggs may not fit in them at all, being too large for the incubator to close over them. And, there is no room for hatching the chicks in them, so while you can use them for the incubation period, you'd need to find something else to use as a hatcher.
*** Nurture Right 360 ***
If you have one or two eggs on the smaller side, you can fit them in a Nurture Right 360. But they must be small, or they will not fit. This incubator also holds temperature very well and is very reliable, but suffers from the same issues as the Brinseas in that larger eggs will not fit, and you cannot use it as a hatcher.
*** Incuview ***
The Incuview is Incubator Warehouse's tabletop incubator. It is fully digital, like the Brinsea and Nurture Right, and it also will hold a few emu eggs. I personally have never done emu eggs in one, but I know a couple people who have successfully. It too has a lack of headroom though, so like the other options, you'll possibly need to find something else to use as a hatcher.
*** Hovabator and Little Giant ***
These Styrofoam incubators are usually a bit larger than the other options, allowing for a greater capacity of eggs. Some people swear by them. I personally will not use one, since I find that any Styrofoam incubators just aren't consistent with temperature, having a harder time keeping it steady than incubators made of other materials. But, they are also less expensive, making them a choice for someone with a tighter budget. They might be dangerous to use as hatchers though, since, at least with the Little Giant I used to have, the heating element runs all along the upper part of the incubator, and is NOT protected. I burned myself on mine more than once. With chickens this isn't an issue since they are too short to ever get near it, but emus are tall, meaning they could quite possibly hit it if they tried to stand up after hatching. For that reason, I recommend caution if you're trying to hatch in one. You might want to come up with some way of keeping the chicks away from it, like perhaps building a hardware cloth guard to go around it.
Homemade Incubators
Homemade incubators are a great budget-friendly choice, and since you are building it, you can tailor it to your needs, eliminating the problems the other smaller incubators have when it comes to emu eggs.
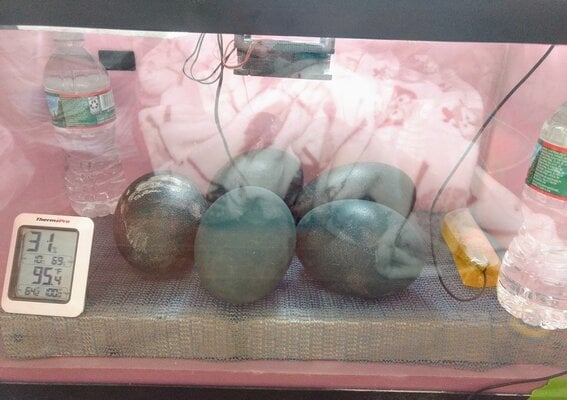
There are lots of guides on how to make your incubator right here on BYC in the Incubators and Brooders section, and they could easily be modified to work better for emu eggs. You could also purchase an Incu-Kit from Incubator Warehouse, which is everything you need for an incubator aside from the housing. I used one to turn a 10 gallon aquarium into an emu incubator and hatcher very easily.
Labeling and Weighing the Eggs
Once you've got your incubator ready, it's time to get the eggs ready for incubating. These steps are just optional, but they're what I usually do. Labeling the eggs allows you to keep track of which egg is which, which helps in several regards. It's especially necessary if you plan to weigh the eggs to track moisture loss. You can do this in several ways. You could tape small squares of paper to the eggs with a label written on them. You could write directly on the eggs with something like a fabric pencil, but this will wear off as incubation progresses and will need to be renewed.
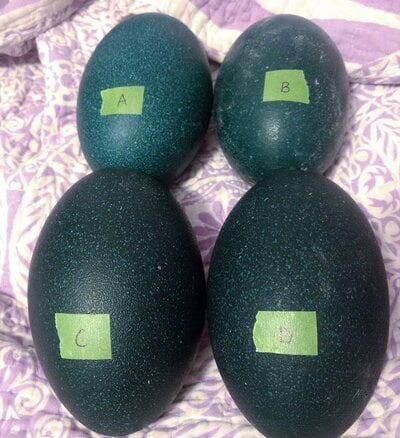
Weighing the eggs is another optional step. If you plan to weigh the eggs to track moisture loss throughout incubation, you need to get a starting weight. Then you can weigh the eggs weekly to make sure their moisture loss is on track. They should lose 15% of the their weight over the incubation period (the length of which will vary depending on which temperature you use).
Some people will say that weighing the eggs is just unnecessary work, but it can in some cases indicate a bad egg if an egg is losing weight way too quickly. In once case I had some smaller eggs that were losing weight too fast in my bigger incubator, so I swapped them into a smaller one with a slightly higher humidity. Both hatched, and if I hadn't been tracking the weight and seen the issue, they might not have, so I think weighing the eggs does have some value.
Temperature
Emus are a little different than other birds. Whereas with other species that have one temperature to use to get optimal hatching results, for emus there is a range. Eggs can be hatched at temperatures from anywhere between 96 to 98. However, the safest range is 96.5 to 97.5. As you would imagine, higher temperatures mean the chick develops faster, so the egg hatches sooner. The table below shows temperatures and what day to expect the eggs to hatch. The bolded temperatures are the safest range. It is highly recommended to stick to a temperature in this range.
| Temperature | Days to Hatch |
| 96.0 F (35.5 C) | 55-56 Days |
| 96.5 F (35.8 C) | 52-54 Days |
| 97.0 F (36.1 C) | 50-52 Days |
| 97.5 F (36.4 C) | 49-51 Days |
| 98.0 F (36.7 C) | 46-48 Days |
Humidity
Emu eggs, again, are a little different than other birds in this regard. They like the humidity to be between 30% and 40%. Some experienced breeders say set it to 36% and then just leave it alone there. If you're weighing your eggs, you can monitor the weight loss to make sure they are on track and that the humidity is correct. Weight loss is the only way to check for this in emu eggs, since of course you can't candle them to watch the air cell growth like you can in other eggs. If you are weighing the eggs, you can dial in your humidity to where it needs to be. If you're not, try setting it around 36% and leaving it there.
Too much weight loss in an egg means the humidity is too low, and needs to go a bit higher. Too little weight loss means it's too high, and needs to come down.
Very excessive weight loss can be a sign of a bad egg. If your other eggs are all on track but one egg in particular is losing tons of weight, chances are it's no good.
If the weight loss is just a little high compared to your other eggs, you can try taping the egg. This is when you use a piece of masking tape or medical tape to cover around the shell a little bit, to help the egg retain moisture. However, you never want to tape more than 10% of the shell. The growing chick is large and needs lots of oxygen to be coming in through the shell, so covering too much of the shell can cause issues.
Turning
Like most other birds' eggs, emu eggs need to be turned. If you have an auto-turner, that's the best way to handle this. The eggs will be turned for you so you don't forget, and there's never a big gap of time in which they're not turned. Even if they are in an auto-turner, you'll want to rotate them 180 degrees by hand once a day.
If you don't have an auto turner, you'll want to roll the eggs 180 degrees at least three to five times a day. More is always better. It's recommended to turn an odd number of times so that when you're sleeping and not turning them, they'll spend that long period of not being turned on a different side each day.
Checking for Life
Obviously, you cannot check emu eggs for life by candling them. The shells are just far too dark. So, you have to look for other signs of life. Now, even if your egg shows none of these signs, that doesn't mean you should pull it out of the incubator! Some eggs never give any signs, and then end up hatching at the end. So if you don't see any of these signs, but your egg doesn't smell or isn't leaking, just leave it in until the expected hatch date. You can start checking for these signs of life around Day 30 of incubation.
Egg Tilt
One of the first signs you may be able to see is the egg tilting, with the air cell end up and the round end down. As the chick develops and the egg loses moisture, the weight of the growing chick can cause the egg to start tilting at an angle.
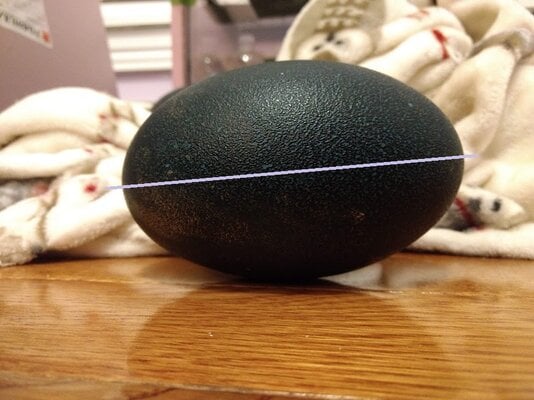
As you can see from the line in this picture, the egg is sitting at an angle, with the air cell going up, and the other end coming down.
Egg Warm on One End
Another sign of life is if the egg stays warm at the end where the chick would be growing, if you allow the egg to cool for a bit. Take the egg out of the incubator and let it sit out for about 5 minutes. Then, feel each end of the egg. The air cell end should be cooler than the other end, where the chick's body mass is keeping the egg warmer.
Egg Wiggling
This is the definitive sign of life. If you see this happen, your egg is developing for sure. As incubation progresses, you can take the egg out of the incubator and whistle to it. Often, a growing chick will respond to the sound and move, causing the egg to wiggle. At first, these movements might be small and hard to see, but as the chick grows, the movements will become more robust and much easier to spot. The earliest I have had an egg wiggle is Day 32. Some eggs never wiggle at all and still go on to hatch, so again, do not assume the egg is no good if it never wiggles. You never know.
The Hatch
Once you get towards the end of incubation, it's time to start preparing for the hatch. Unlike other kinds of birds you may have hatched before, emus do not have a 'lockdown' phase of incubation. You don't stop turning the eggs or boost humidity. Instead, you check for signs the egg will be hatching, and then you just stop turning it and let it do its thing.
Signs of Hatching
Obviously, as you get towards the end of the incubation timeframe for the temperature you chose to incubate at, you will start expecting to see hatching activity. But how do you know when to stop turning? You'll look for signs the chick is getting ready to hatch.
One such sign is the egg evening out. As was talked about earlier in the article, a developing egg tilts as the chick grows. However, as the chick gets into hatching position and internally pips, the weight is distributed evenly along the egg again, and the egg will level out. If you see the egg leveling out, this is sign that hatch is nearing.
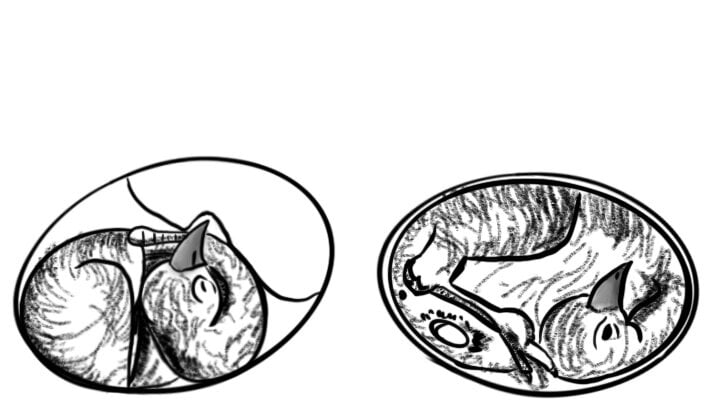
Another sign to look - or rather listen - for is the egg to start whistling. Once the chick is internally pipped, it can and will whistle. If you listen closely, you can hear it through the shell. A whistling egg is soon to hatch. Listen closely to the video below and you will hear the chick inside the egg whistle. The video is very short, but the sound you hear is the chick.
Lastly, you can try 'sounding' an egg. Sounding involves taking a small metal rod and gently striking the egg. An egg which has internally pipped or is drawing down sounds different than an egg that has not. It will make a more 'hollow' sound than an egg that is not yet at those stages. To really be able to hear what you're listening for, you can make a test egg by blowing out an infertile egg, making a hole in one end only, and tapping that egg. That egg will make the sound you're listening for. This method of course might not be useful to those that don't have an egg that they can blow out and listen to.
Hatching
Once you have stopped turning the egg, it is a waiting game for hatching to begin. The first thing that will happen, like with other birds, is a pip.
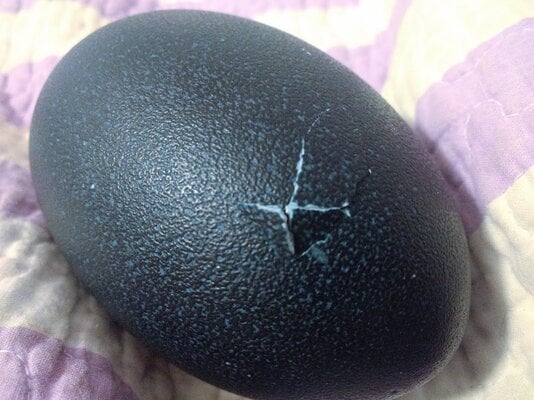
From there, the chick will finish absorbing the blood and yolk, and begin to shove against the shell using its legs. Unlike other birds, the chick will not zip. Instead, it will push again and again until the shell cracks, and then it will shove itself out of the egg.
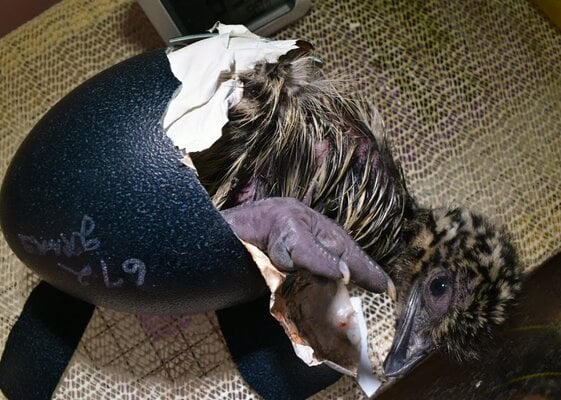
If you'd like to watch a livestream recording of a chick hatching, you can watch the video below.
https://fb.watch/avjoOKcWwW/
It Hatched! Now What?
The newly hatched chick will be very wobbly. You should give it some time in the incubator to dry out and recover from the exhausting process of hatching. Once it's dry, you can move it to the brooder. Offer food and water, but know that it very possibly won't be interested in eating and drinking for a few days, as it will be living off the yolk. It also takes them a few days to find their footing and be able to stand and walk around.
Conclusion
Hopefully this article helped answer all your questions about hatching emu eggs! If you'd like to chat, or ask more emu questions, please stop by the Emu Chat Thread. You can read about my first emu hatch and all my experiences hatching emus there, too.

