How to hatch chickens!
Hatching chicks is very fun, but one has to know about everything from where to get eggs to how to get 50 eggs from only one hen and a rooster, via this marvelous thing called chicken math. Here is the ultimate guide to raising chicks from scratch.
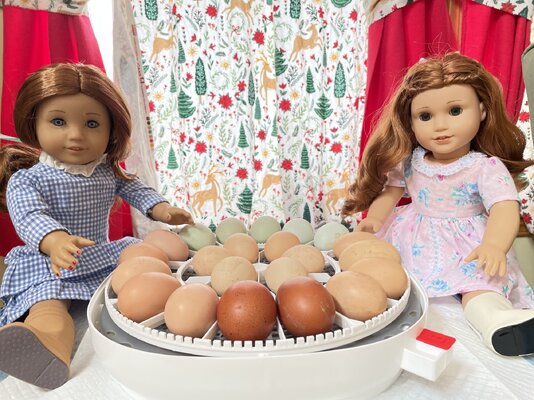
 First you will need an incubator. A broody hen will work fine, but it is usually easier to use an artificial one, if you aren't concerned about power outages. I used the Nurture Right 360. One reason we chose this model is because it has an automatic egg turner. A broody hen turns her eggs up to 100 times per day. The reason they turn their eggs is because the yolk will float to the top over time and stick there, and the chick won't hatch. Make sure to cover the incubator with a scarf or a towel, leaving the air holes open. This is because the UV rays will harm the eggs making your hatch rate go down drastically. The temperature should e set on 99.5 degrees F, and the humidity at 50%, which you will turn up to 75% at lockdown. Lockdown is the 3 days before the chicks are scheduled to hatch. It is usually done on day 18 of 21.
We did 3 hatches so far. The first hatch, we had 10 out of 22 eggs hatch. We found out that our incubator was running cold by about 1.5 degrees. Which doesn't sound like too much to you, but in reality, it is huge. We set the next hatch at the accurate temperature. We calibrated a thermometer by placing it in ice slurry water. Our next 2 hatches had much better hatch rates – 16 from the second hatch and 17 from the third.
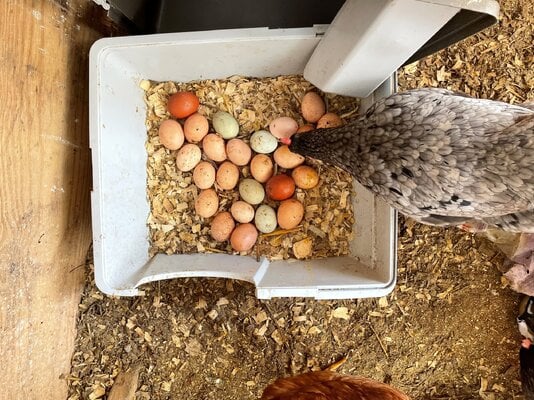
 What good is an incubator without eggs? You can get eggs from online, friends and family, or your own flock. If you get the eggs from friends or family, there must be a rooster in the flock. The same with if you are collecting eggs from your own flock. This is why you can't incubate store bought eggs unless they specifically mention that they are for hatching.
If you are using eggs from your own flock , you will need to check if the eggs are fertile. About a week before you start collecting eggs, you should crack a few different ones open. There should be a bullseye somewhere on the egg yolk. The eggs you put in the incubator should be clean, not cracked, and not have a thin shell. I put in many blue and green eggs, some silkie eggs, and a few regular brown ones.
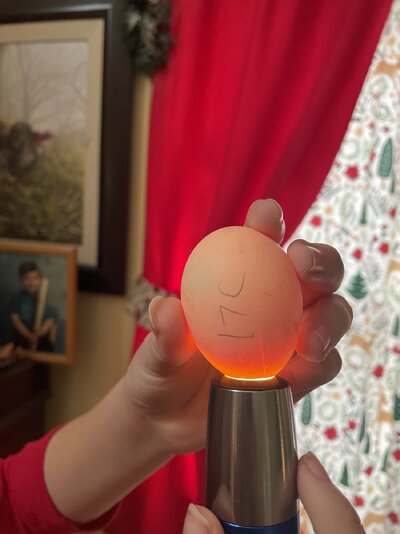
 On day 18, you will candle the eggs. There should be veins or at least an air sac visible when you shine the flashlight under the egg. Candling is best done at night, or under a dark blanket. There will be at least one dud egg, which will not have either an air sac or veins. If you find a dud egg, make sure to remove it, but don't break it. It is rotten, and could explode in the incubator.
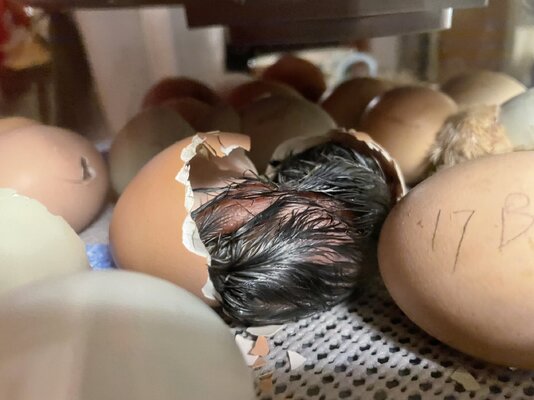
 Hooray! It's day 21 and your eggs have hatched. One of them is struggling. Normally, a chick will pip or make a little hole in the shell. Then it will zip, which is making a bunch of holes in a line down the shell, and then it will just kick its way out. A chick can pip because it has an egg tooth on the top of its beak. But this one has pipped facing the floor of the incubator. You will need to quickly open the incubator and turn the egg. Make sure to not take too long, or the humidity will drop, causing the unhatched chicks to “shrink wrap”. Shrink wrapping happens when the soft moist inner membrane dries out and shrinks crackly around the chick so it can't move or sometimes breathe.
When the chick finally hatches out he looks like a wet monster that came out of a sci fi movie. Don't worry. The chick will dry and fluff out in about an hour, and will not look hideous. It will be a cute fluffy little Easter chick.

Hatching chicks is very fun, but one has to know about everything from where to get eggs to how to get 50 eggs from only one hen and a rooster, via this marvelous thing called chicken math. Here is the ultimate guide to raising chicks from scratch.
 First you will need an incubator. A broody hen will work fine, but it is usually easier to use an artificial one, if you aren't concerned about power outages. I used the Nurture Right 360. One reason we chose this model is because it has an automatic egg turner. A broody hen turns her eggs up to 100 times per day. The reason they turn their eggs is because the yolk will float to the top over time and stick there, and the chick won't hatch. Make sure to cover the incubator with a scarf or a towel, leaving the air holes open. This is because the UV rays will harm the eggs making your hatch rate go down drastically. The temperature should e set on 99.5 degrees F, and the humidity at 50%, which you will turn up to 75% at lockdown. Lockdown is the 3 days before the chicks are scheduled to hatch. It is usually done on day 18 of 21.
We did 3 hatches so far. The first hatch, we had 10 out of 22 eggs hatch. We found out that our incubator was running cold by about 1.5 degrees. Which doesn't sound like too much to you, but in reality, it is huge. We set the next hatch at the accurate temperature. We calibrated a thermometer by placing it in ice slurry water. Our next 2 hatches had much better hatch rates – 16 from the second hatch and 17 from the third.
 What good is an incubator without eggs? You can get eggs from online, friends and family, or your own flock. If you get the eggs from friends or family, there must be a rooster in the flock. The same with if you are collecting eggs from your own flock. This is why you can't incubate store bought eggs unless they specifically mention that they are for hatching.
If you are using eggs from your own flock , you will need to check if the eggs are fertile. About a week before you start collecting eggs, you should crack a few different ones open. There should be a bullseye somewhere on the egg yolk. The eggs you put in the incubator should be clean, not cracked, and not have a thin shell. I put in many blue and green eggs, some silkie eggs, and a few regular brown ones.
 On day 18, you will candle the eggs. There should be veins or at least an air sac visible when you shine the flashlight under the egg. Candling is best done at night, or under a dark blanket. There will be at least one dud egg, which will not have either an air sac or veins. If you find a dud egg, make sure to remove it, but don't break it. It is rotten, and could explode in the incubator.
 Hooray! It's day 21 and your eggs have hatched. One of them is struggling. Normally, a chick will pip or make a little hole in the shell. Then it will zip, which is making a bunch of holes in a line down the shell, and then it will just kick its way out. A chick can pip because it has an egg tooth on the top of its beak. But this one has pipped facing the floor of the incubator. You will need to quickly open the incubator and turn the egg. Make sure to not take too long, or the humidity will drop, causing the unhatched chicks to “shrink wrap”. Shrink wrapping happens when the soft moist inner membrane dries out and shrinks crackly around the chick so it can't move or sometimes breathe.
When the chick finally hatches out he looks like a wet monster that came out of a sci fi movie. Don't worry. The chick will dry and fluff out in about an hour, and will not look hideous. It will be a cute fluffy little Easter chick.
