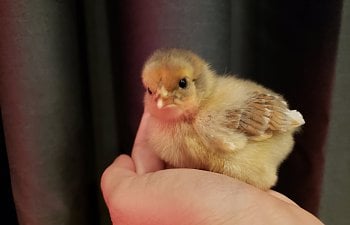
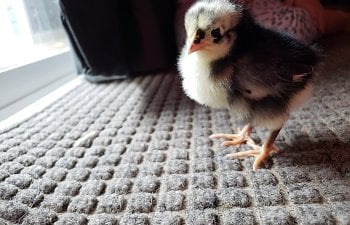
April 29, 2018: Construction of my very first coop is underway! I'm about 3 weeks into the project now. A combination of weather (it's been VERY rainy), faulty equipment (our backhoe needed a replacement part and that delayed progress on our foundation), and needy children made for a pretty slow start to this project. Now that the foundation and most of the framing for the coop has been completed, it's coming together quickly. The chicks are currently about 6 weeks old and rapidly outgrowing their brooder. I'm definitely feeling the pressure to get the coop finished so I can move them outside!
The design plan (https://www.backyardchickens.com/threads/looking-for-feedback-on-coop-design.1232742/):

I failed to take before pictures of the site, but we removed a couple of old holly trees and a shrub before our backhoe decided it wasn't going to start anymore! Unfortunately, our chicks didn't get the memo and kept on growing. So, plan B...

We decided to start framing the coop on a concrete slab near the entrance to our basement so that progress could continue while we waited for a new backhoe part.

After we got the backhoe up and running again, we finished grading for the foundation and then hand dug a trench to place the cinder blocks. We then moved the framed coop onto the cinderblocks and continued constructing. The current goal is to get the coop completed ASAP so that the chickens can move outside and then to add the run.


May 1, 2018: I managed to get the vinyl flooring installed (and adhesive all over myself) and a few of the wall boards in place before the baby woke up from his nap. We decided to move a section of our fence while we had the backhoe at our house for digging the foundation. So, I'm repurposing the old fence boards for the walls.
View attachment 1369702
May 9, 2018: The coop is SO close to being move-in ready! Doors and hardware have been installed on the poop board door, the nesting box, and the front side. Hardware cloth has been added in the top vent areas and the plywood support for the roofing materials is in place. I just need to trim out a few gaps, make the pop door, and add a roost and the chickens can move in!


May 10, 2018: The chickens are officially moved in! There's still a lot of work to be done (mainly adding a run to the coop), but it's complete enough for them to safely live in for now!

July 23, 2018: Not much has been done in the last 2 months as other projects took priority. Two of the chicks turned out to be roosters and have been relocated to a farm. The four remaining girls are doing great and I'm hoping to start work on their run in the next few weeks.

August 14, 2018: I picked up a few new babies - nothing like some new chicks to get me motivated!


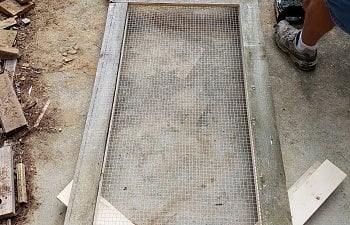
We're finally making progress on the run! We used 2x4's for uprights, 4x4's for corner posts, and a 2x6 for a baseboard and 3' wide rolls of hardware cloth. For the front wall of the run, we placed the 3 2x4 uprights and 4x4 corner post on the ground and spaced them 3' apart (so that the hardware cloth came about halfway across the width of each board) and hammered the hardware cloth into place using fence staples. We then screwed the 2x6 baseboard across the bottom of each upright, sandwiching the hardware cloth between the uprights and the baseboard. The hardware cloth was cut so that it extended an extra foot or two beyond the bottom of the baseboard, to create a skirt. We used another 2x4 across the top as a temporary brace to make it sturdier prior to raising the front wall and placing it on the foundation. We then added some additional 2x4 braces at the corner post to keep it upright as we fastened it to the coop and began working on the remaining sides.

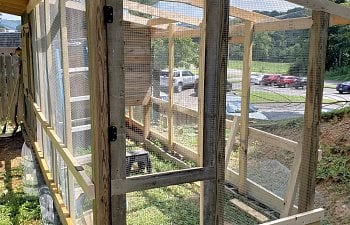
We built the back wall in place, working from the coop to the far corner of the run. We attached the roof supports spanning from the front upright 2x4's to the corresponding rear upright 2x4's, then attached the hardware cloth and finally the 2x6 base boards.

My original plan had the door the the run adjacent to the coop on the front side, but I realized this would open directly into the ramp. So, I opted to move the door to the far end of the run. We used a 4x4 for the upright support for the far/short side of the run additional strength, but it was otherwise built in the same way as the back side. We added horizontal 2x4 boards along the entire perimeter of the run at the same level as the bottom of the coop and also below the roof supports - this added extra stability and I also just liked the way it looked
The door to the run was constructed using 2x4's and fence boards. The 2x4's were measured and mitered to form a rectangle to fit in the opening (I believe it was approximately 30" wide and 6' tall) between the 4x4 uprights. Hardware cloth was then stapled to the 2x4 frame and the fence boards were screwed on top (sandwiching the hardware cloth between the 2x4 frame and the fence face boards). Three hinges were evenly spaced and placed so that the door would swing outward (not into the run).


Additional roof supports were added between each of the rafters at the level where the sheets of plywood roof sheathing would meet and then plywood sheets were added to the roof and screwed into place.

We also built a ramp out of two pressure treated 8' long 2x6 boards held together with about 12 scrap 2x4 "footholds" spaced about 8" apart.
8/27/2018: The final pieces of plywood were attached to the roof today and covered with Ondura roofing. We chose to use Ondura Corrugated Asphalt Roofing https://ondura.com/ because it is lightweight and easy to cut (unlike metal roofing), was readily available at our local Lowe's, and reasonably priced. It has been on the coop portion for several months now and so far so good - no leaks or other issues!

Just need to add a few finishing touches and some gravel and sand to the foundation and this project will be complete!
The design plan (https://www.backyardchickens.com/threads/looking-for-feedback-on-coop-design.1232742/):
I failed to take before pictures of the site, but we removed a couple of old holly trees and a shrub before our backhoe decided it wasn't going to start anymore! Unfortunately, our chicks didn't get the memo and kept on growing. So, plan B...
We decided to start framing the coop on a concrete slab near the entrance to our basement so that progress could continue while we waited for a new backhoe part.
After we got the backhoe up and running again, we finished grading for the foundation and then hand dug a trench to place the cinder blocks. We then moved the framed coop onto the cinderblocks and continued constructing. The current goal is to get the coop completed ASAP so that the chickens can move outside and then to add the run.
May 1, 2018: I managed to get the vinyl flooring installed (and adhesive all over myself) and a few of the wall boards in place before the baby woke up from his nap. We decided to move a section of our fence while we had the backhoe at our house for digging the foundation. So, I'm repurposing the old fence boards for the walls.
View attachment 1369702
May 9, 2018: The coop is SO close to being move-in ready! Doors and hardware have been installed on the poop board door, the nesting box, and the front side. Hardware cloth has been added in the top vent areas and the plywood support for the roofing materials is in place. I just need to trim out a few gaps, make the pop door, and add a roost and the chickens can move in!
May 10, 2018: The chickens are officially moved in! There's still a lot of work to be done (mainly adding a run to the coop), but it's complete enough for them to safely live in for now!
July 23, 2018: Not much has been done in the last 2 months as other projects took priority. Two of the chicks turned out to be roosters and have been relocated to a farm. The four remaining girls are doing great and I'm hoping to start work on their run in the next few weeks.
August 14, 2018: I picked up a few new babies - nothing like some new chicks to get me motivated!


We're finally making progress on the run! We used 2x4's for uprights, 4x4's for corner posts, and a 2x6 for a baseboard and 3' wide rolls of hardware cloth. For the front wall of the run, we placed the 3 2x4 uprights and 4x4 corner post on the ground and spaced them 3' apart (so that the hardware cloth came about halfway across the width of each board) and hammered the hardware cloth into place using fence staples. We then screwed the 2x6 baseboard across the bottom of each upright, sandwiching the hardware cloth between the uprights and the baseboard. The hardware cloth was cut so that it extended an extra foot or two beyond the bottom of the baseboard, to create a skirt. We used another 2x4 across the top as a temporary brace to make it sturdier prior to raising the front wall and placing it on the foundation. We then added some additional 2x4 braces at the corner post to keep it upright as we fastened it to the coop and began working on the remaining sides.
We built the back wall in place, working from the coop to the far corner of the run. We attached the roof supports spanning from the front upright 2x4's to the corresponding rear upright 2x4's, then attached the hardware cloth and finally the 2x6 base boards.
My original plan had the door the the run adjacent to the coop on the front side, but I realized this would open directly into the ramp. So, I opted to move the door to the far end of the run. We used a 4x4 for the upright support for the far/short side of the run additional strength, but it was otherwise built in the same way as the back side. We added horizontal 2x4 boards along the entire perimeter of the run at the same level as the bottom of the coop and also below the roof supports - this added extra stability and I also just liked the way it looked

The door to the run was constructed using 2x4's and fence boards. The 2x4's were measured and mitered to form a rectangle to fit in the opening (I believe it was approximately 30" wide and 6' tall) between the 4x4 uprights. Hardware cloth was then stapled to the 2x4 frame and the fence boards were screwed on top (sandwiching the hardware cloth between the 2x4 frame and the fence face boards). Three hinges were evenly spaced and placed so that the door would swing outward (not into the run).


Additional roof supports were added between each of the rafters at the level where the sheets of plywood roof sheathing would meet and then plywood sheets were added to the roof and screwed into place.
We also built a ramp out of two pressure treated 8' long 2x6 boards held together with about 12 scrap 2x4 "footholds" spaced about 8" apart.
8/27/2018: The final pieces of plywood were attached to the roof today and covered with Ondura roofing. We chose to use Ondura Corrugated Asphalt Roofing https://ondura.com/ because it is lightweight and easy to cut (unlike metal roofing), was readily available at our local Lowe's, and reasonably priced. It has been on the coop portion for several months now and so far so good - no leaks or other issues!
Just need to add a few finishing touches and some gravel and sand to the foundation and this project will be complete!
