ShannonO
Chirping
- Feb 3, 2017
- 65
- 18
- 61
I recently moved my first-ever chicken flock to their outdoor coop/run. They are 4 weeks old. I wanted to continue to feed fermented crumbles but needed a feeder that would work as my chicks grow out of the red chick feeder trough, and because they fill it with litter and overturn it every day.
I found a piece of 5’ long piece of 4” inside diameter PVC at home. I designed based on that.
Requirements:
I over-engineered and also paid more than needed because of poor prior planning.
Materials:
Steps:
I’m sure I’m forgetting important details. If I’ve omitted useful tidbits, please let me know and I’ll update the OP. Oh, I spent about $50 :eek!: Kinda ridiculous. And I complete guessed about the length needed. Probably could have been shorter for 10-16 birds?
Thanks to this community for providing everything I have so far needed to start our chicken journey. Thanks to these threads on fermented feeders, which provided a jumping-off point and ideas for my feeder. Among many other things, I know from these threads that I need to watch for irritation of my birds’ combs and wattles. I can raise and lower the baffle as needed.
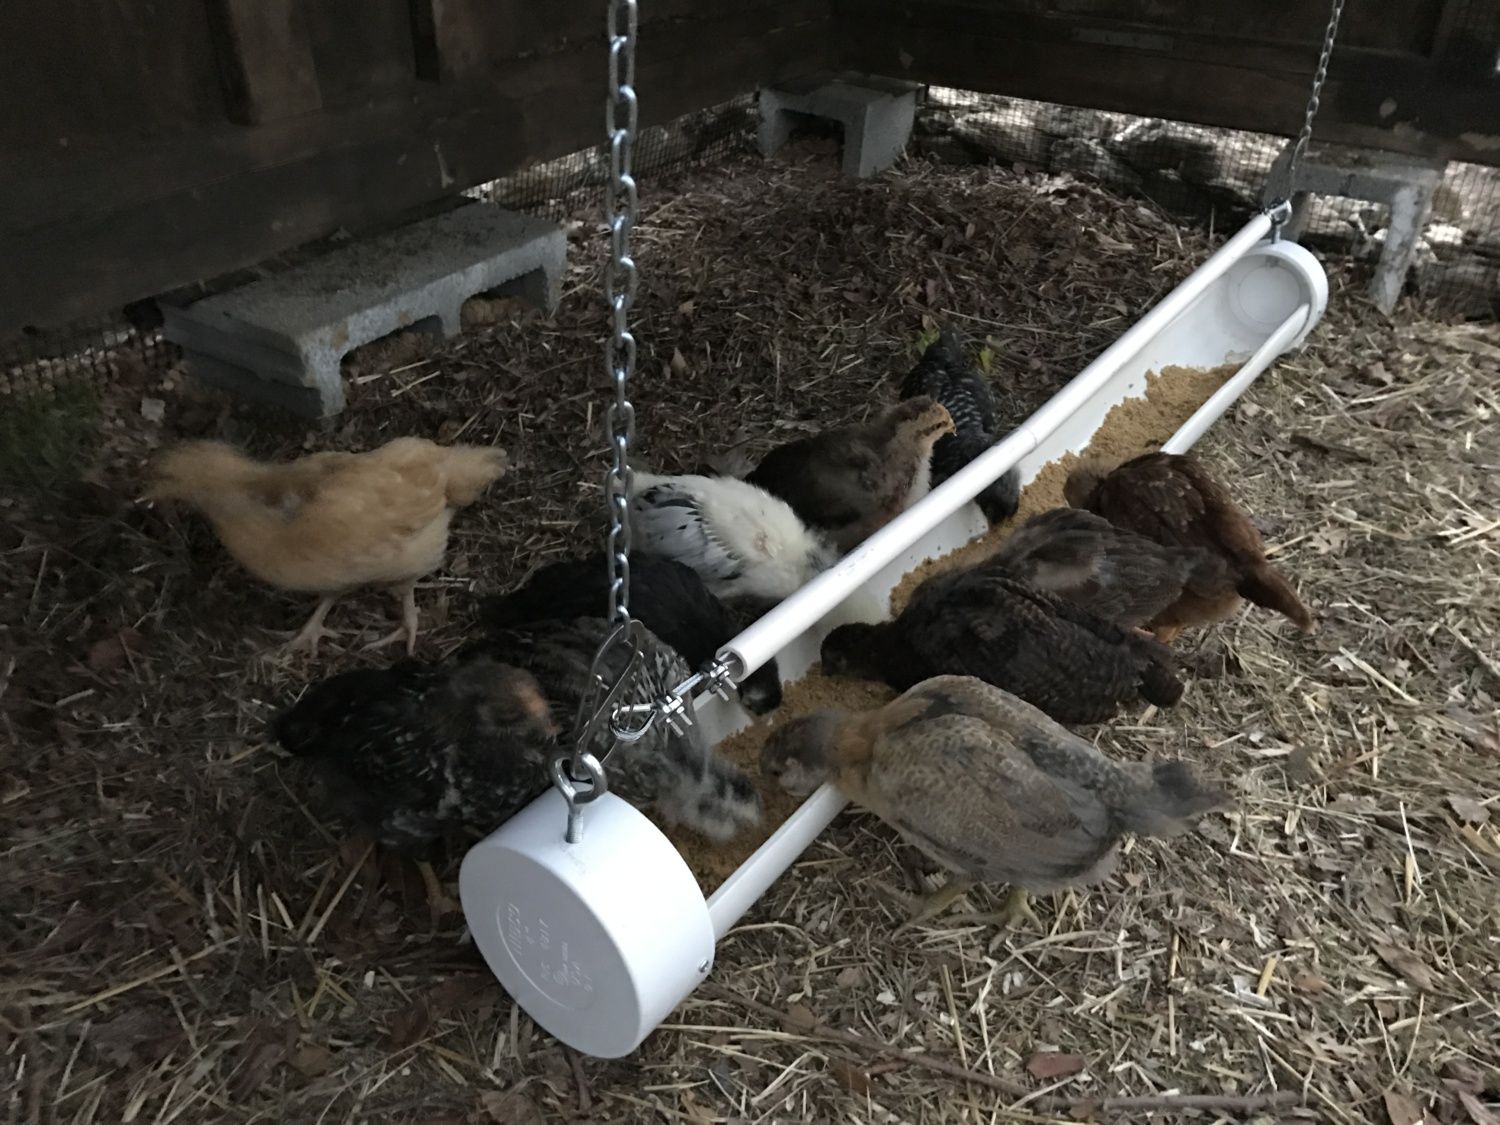
It’s been in use for a grand total of two days, three feeds, and only with 4-week old standard birds. They immediately started standing on the food when I hung it and added feed. I have not seen anyone stand on or in it since adding the baffle, and no evidence of poop was discovered.
Here are some photos:
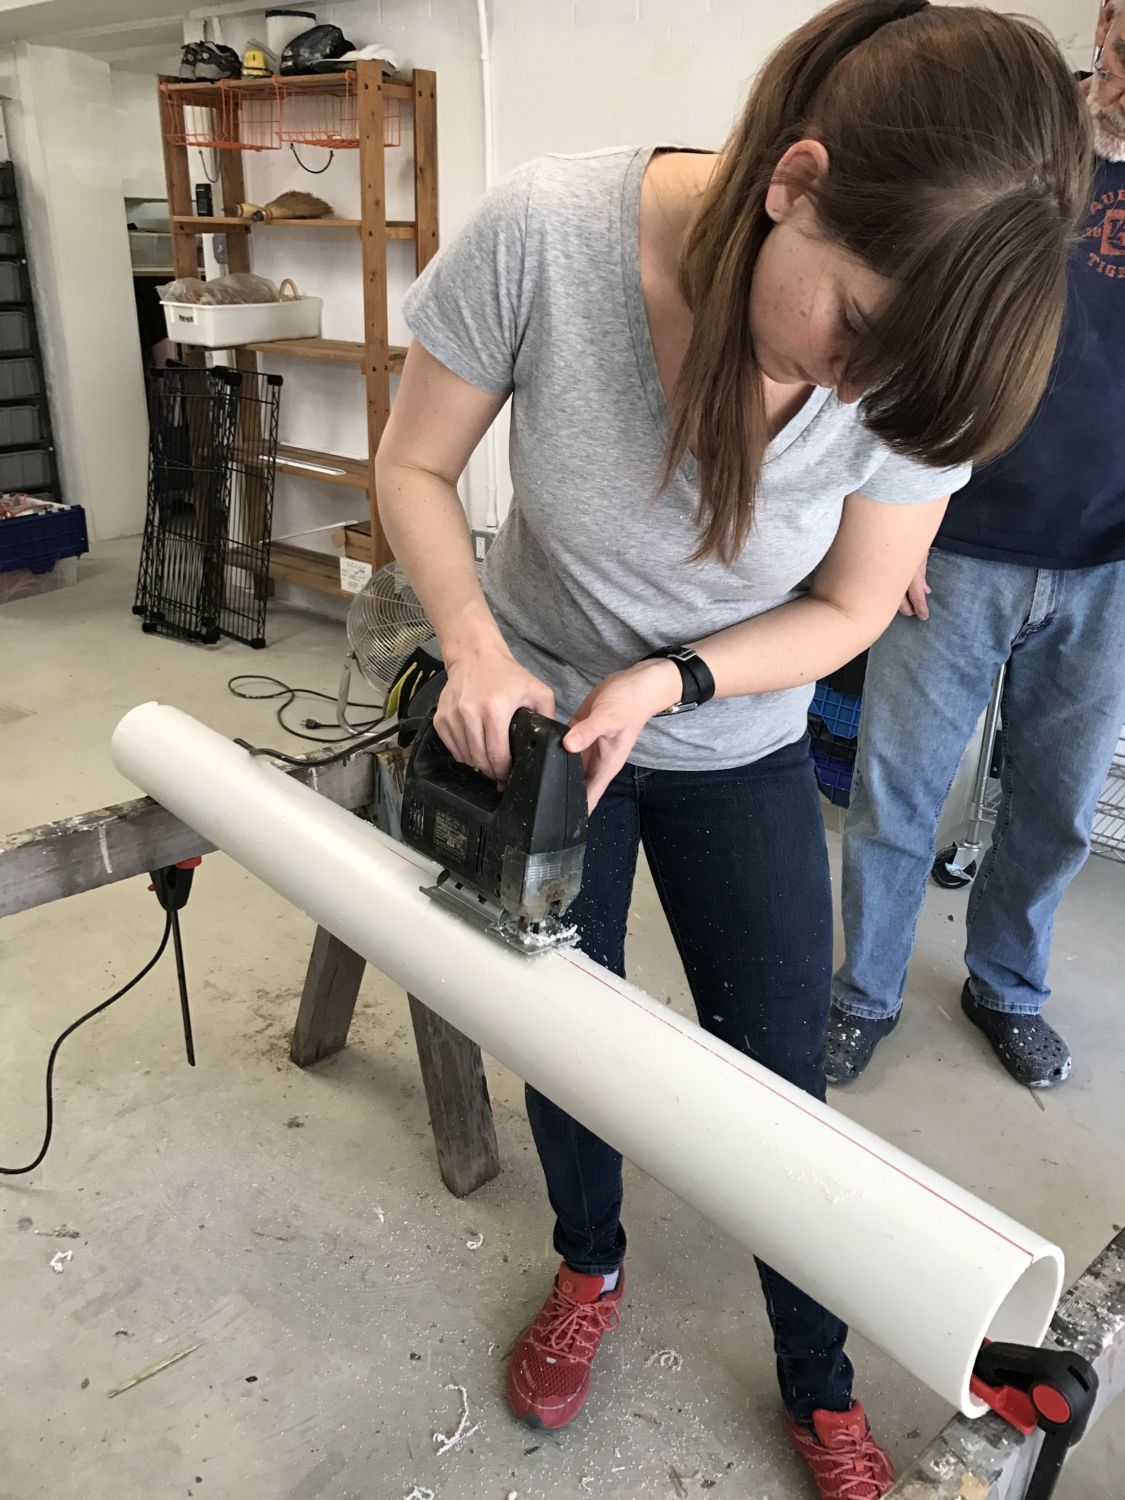
Cutting the PVC into a trough. This is me practicing bad safety. Tie up your hair, and wear eye and ear protection, folks!:
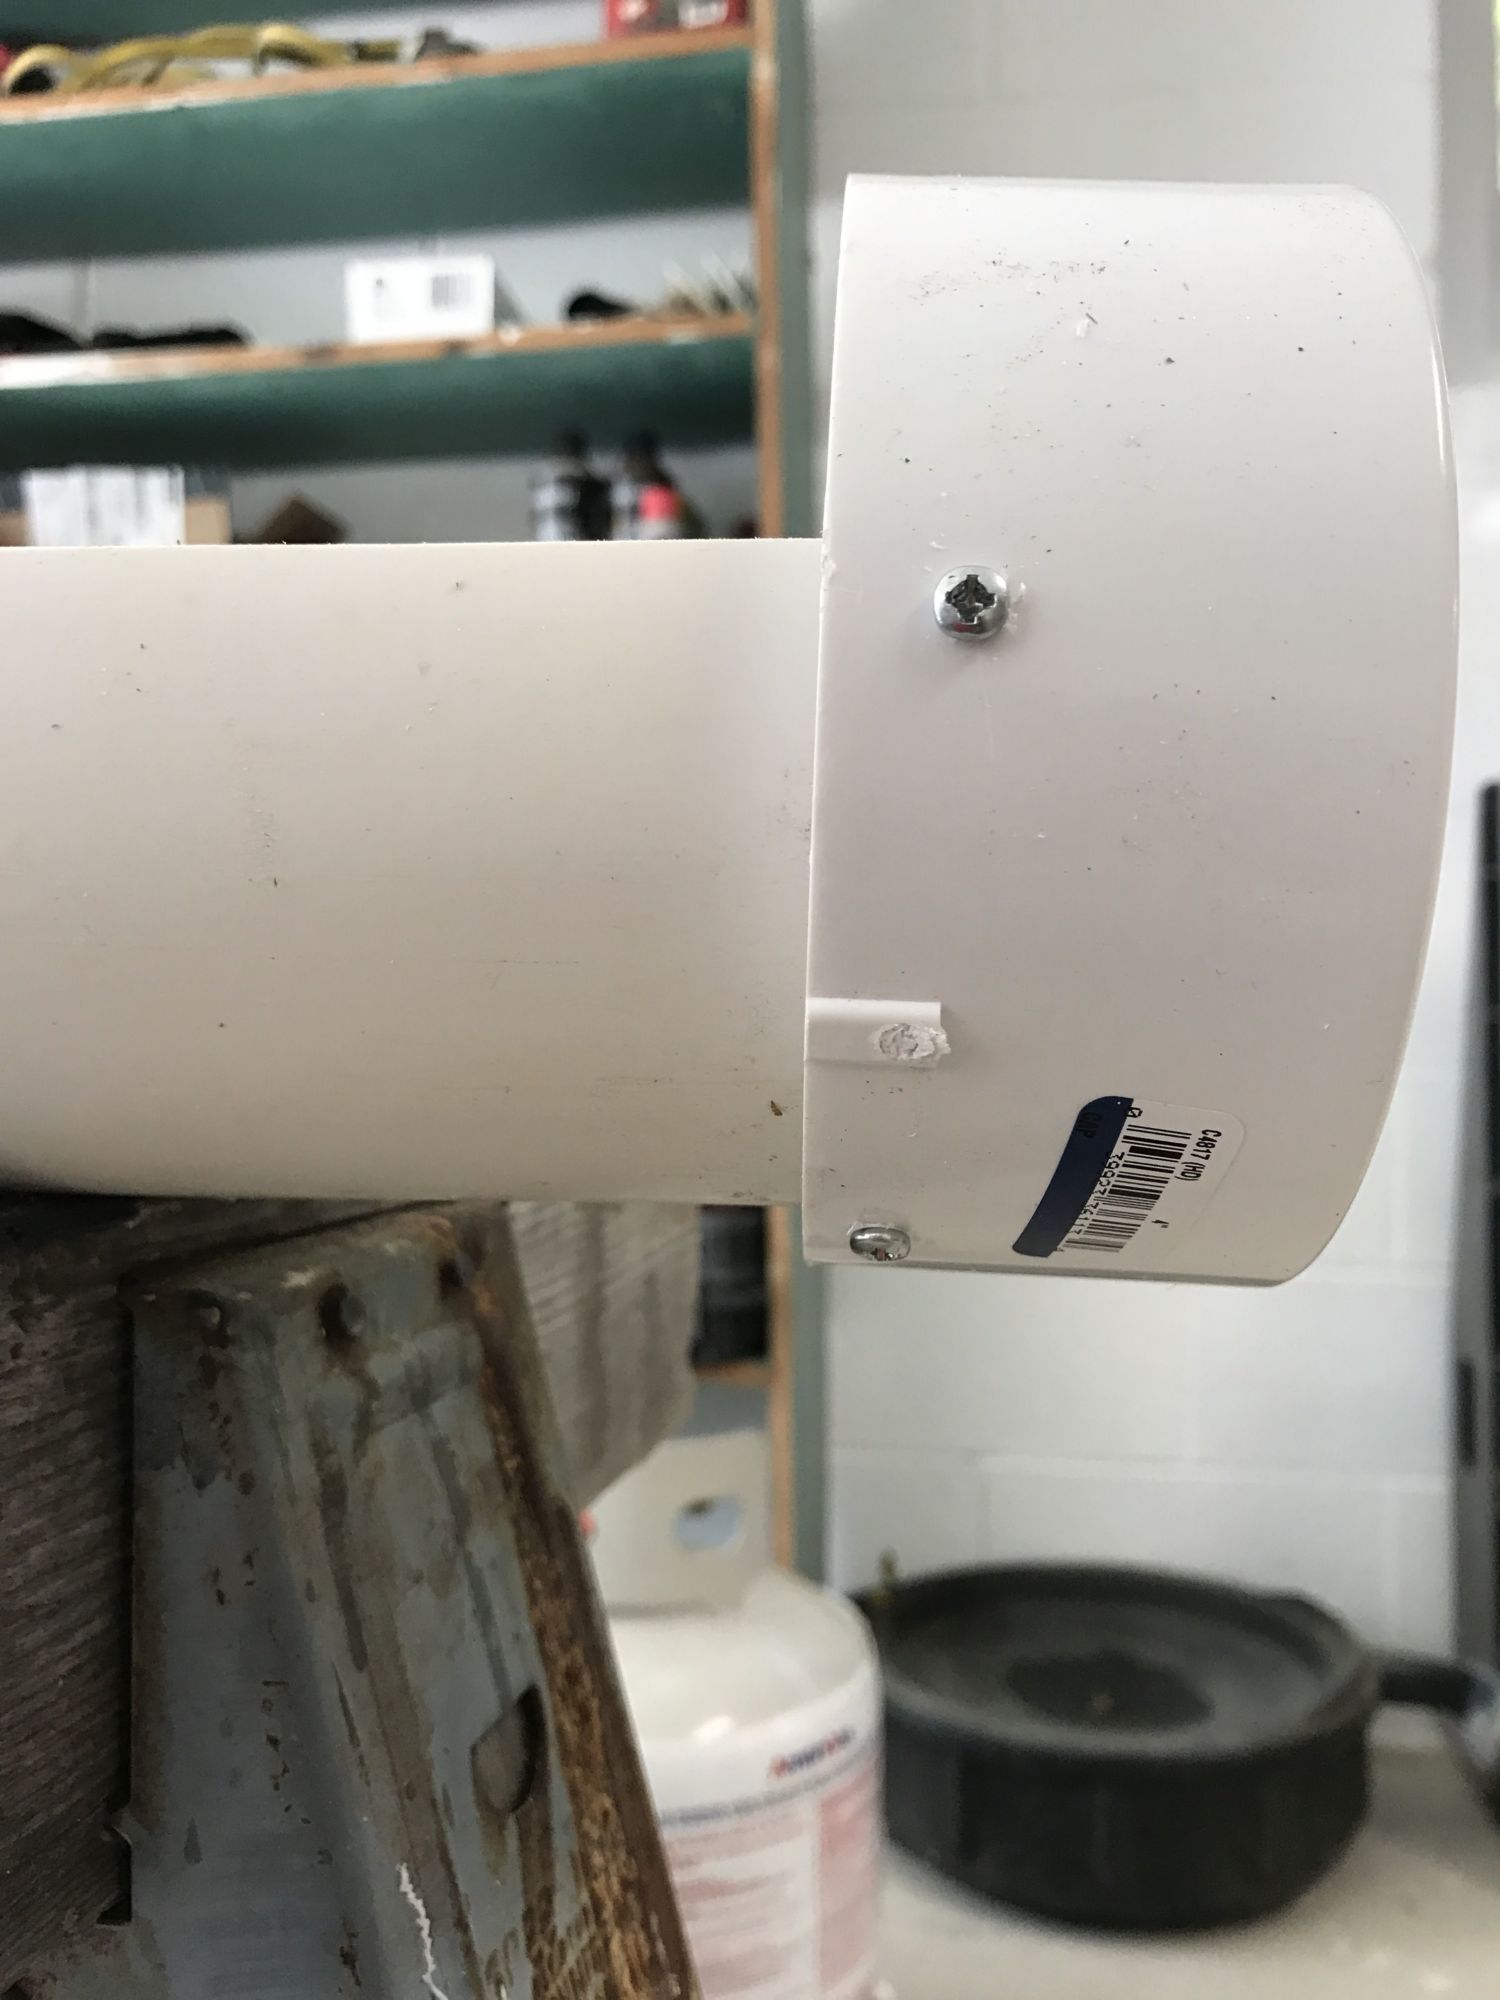
Fasten the end caps:
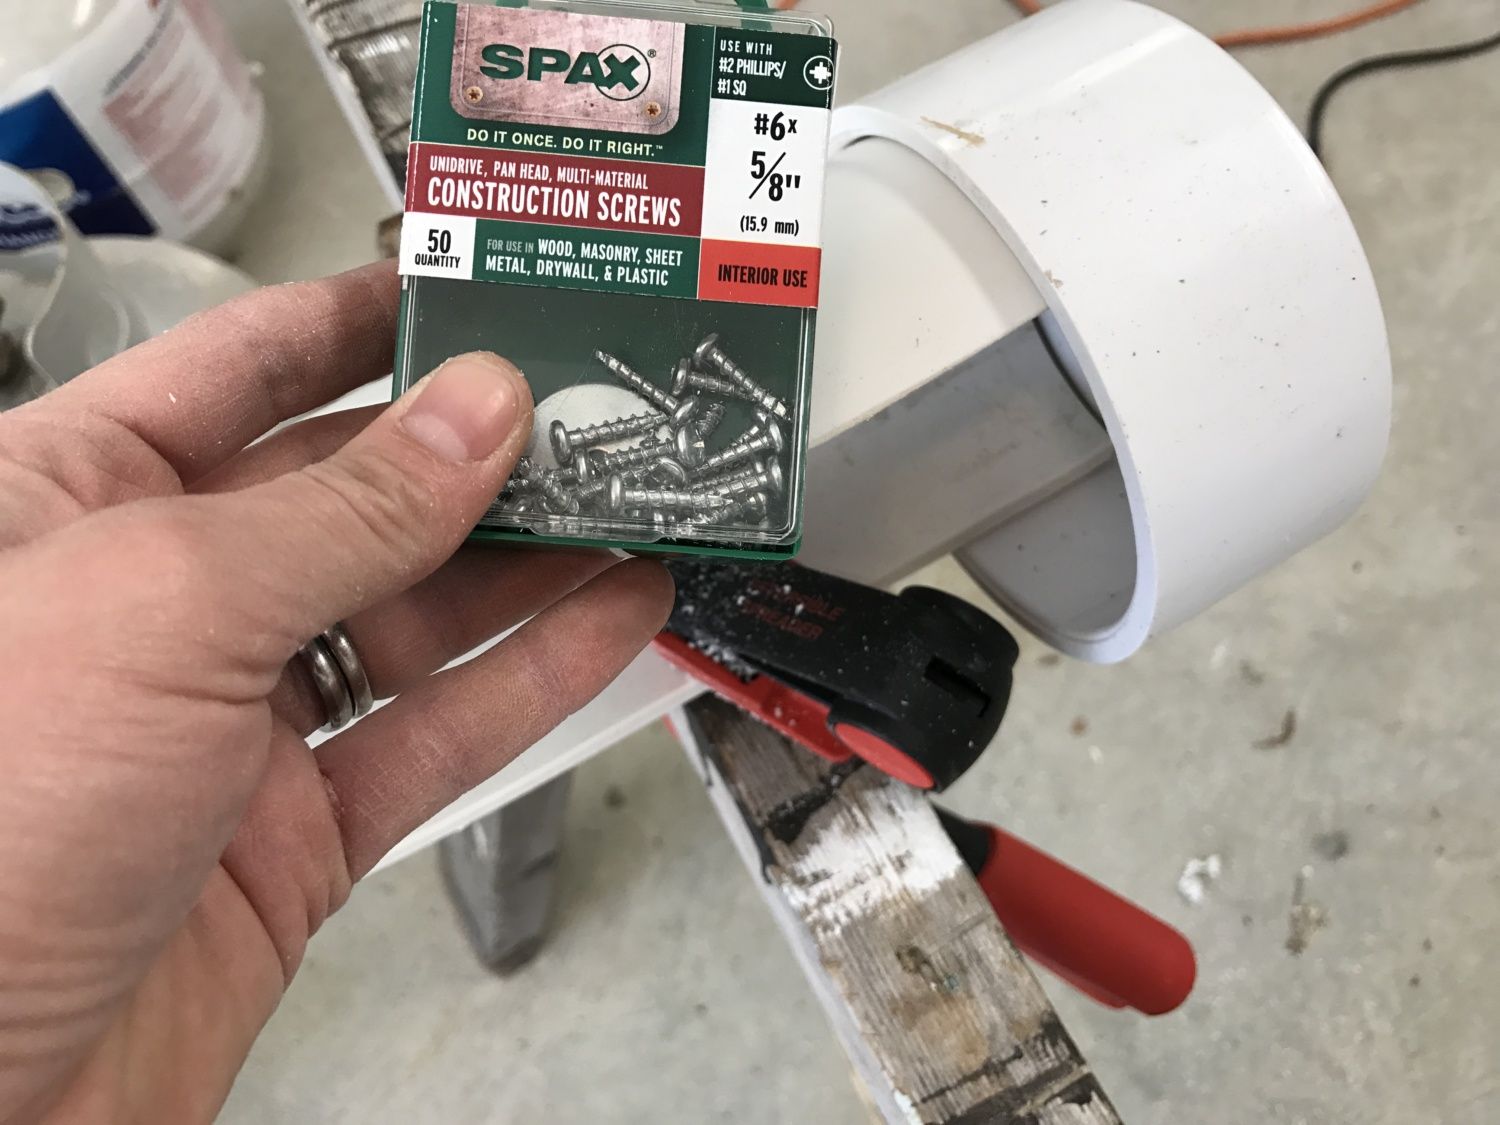
There are the end cap fastening screws:
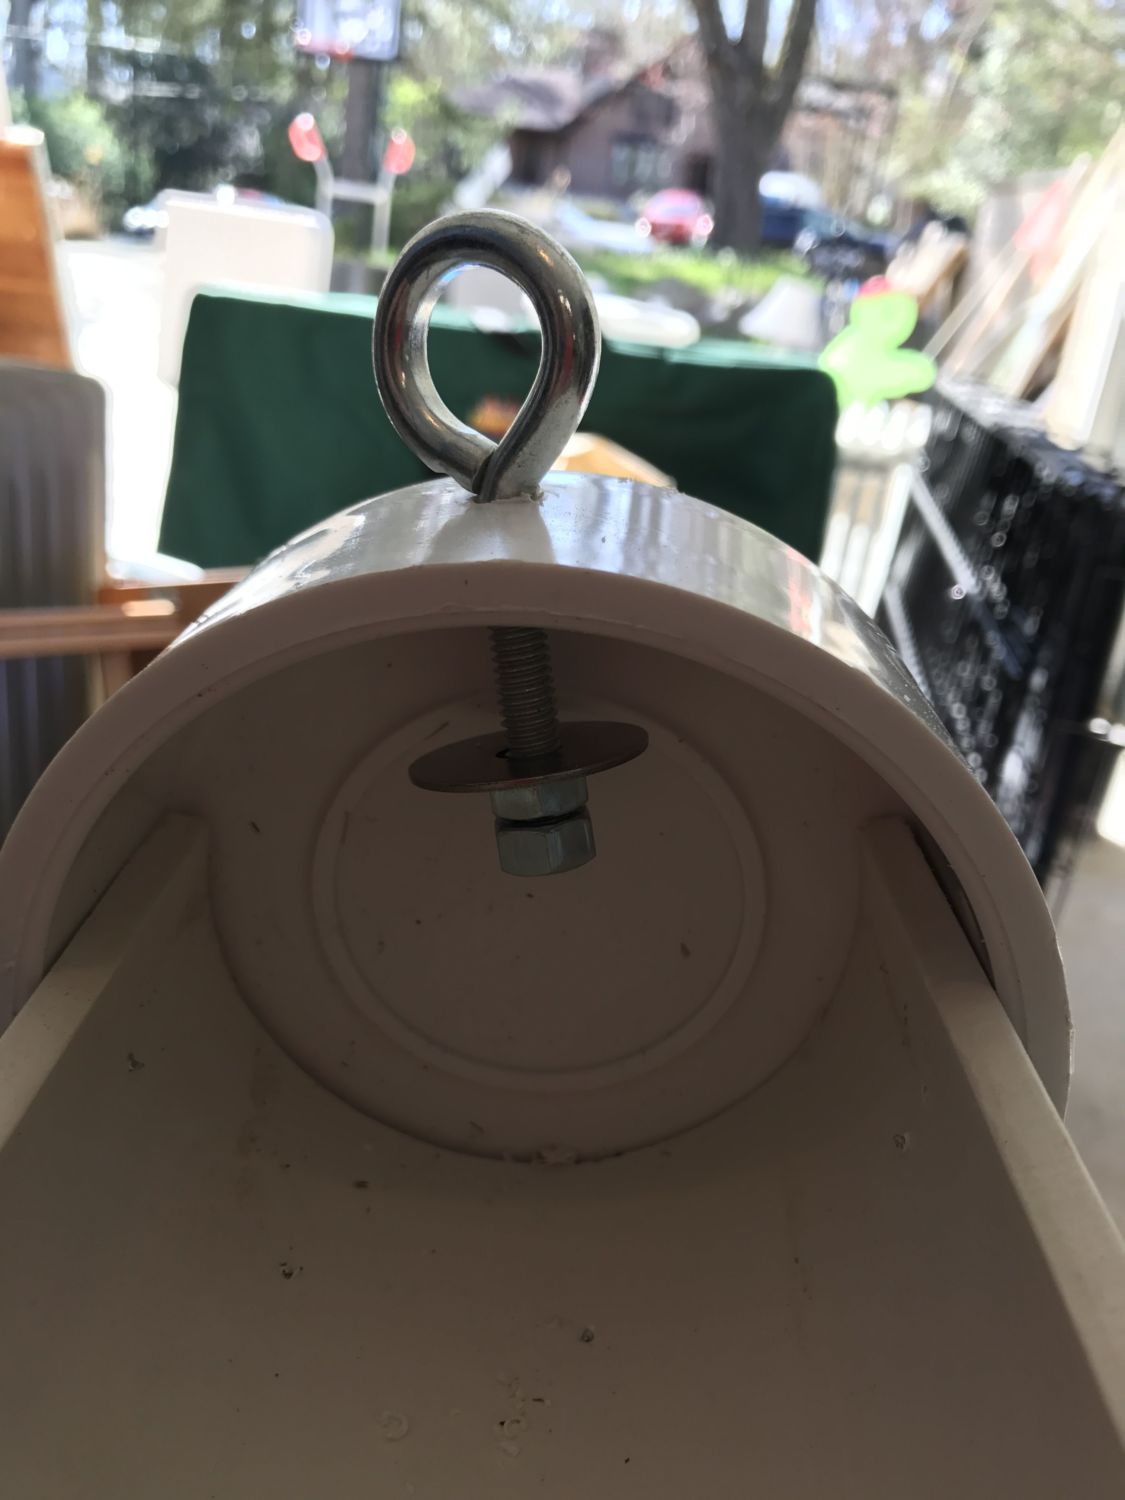
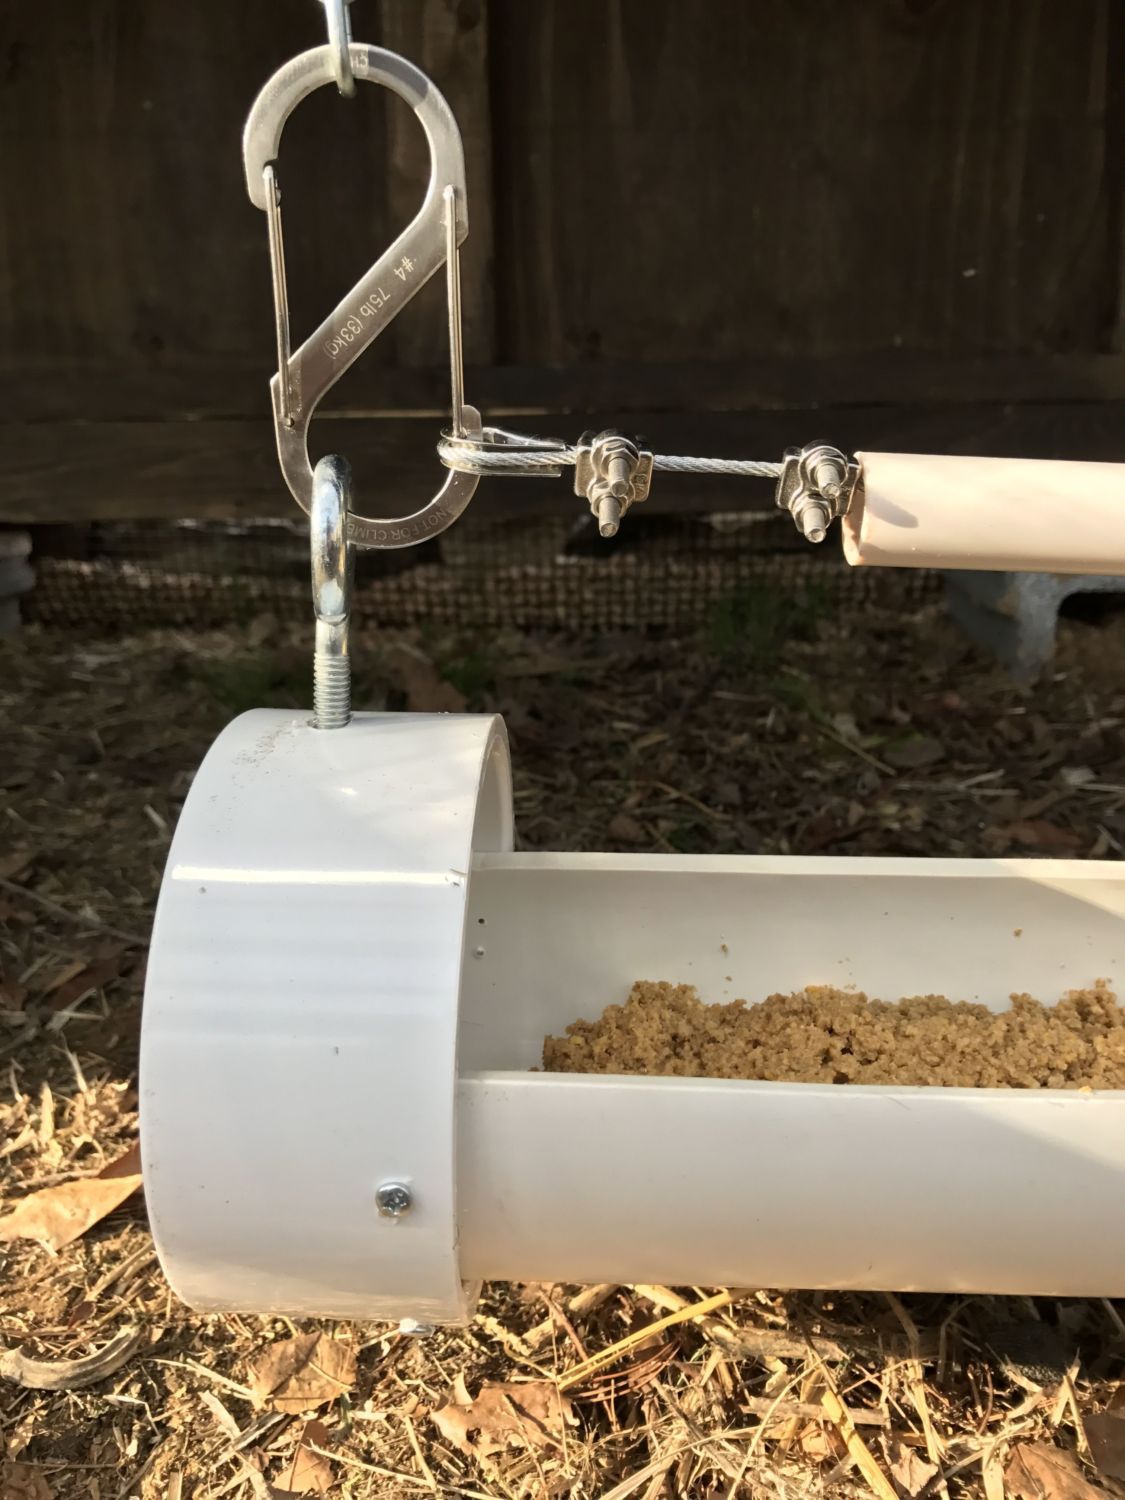
Eye bolts in the end caps:
Too-expensive s-biners attached to the eye bolts and wire, and the wire u-bolt clamps.
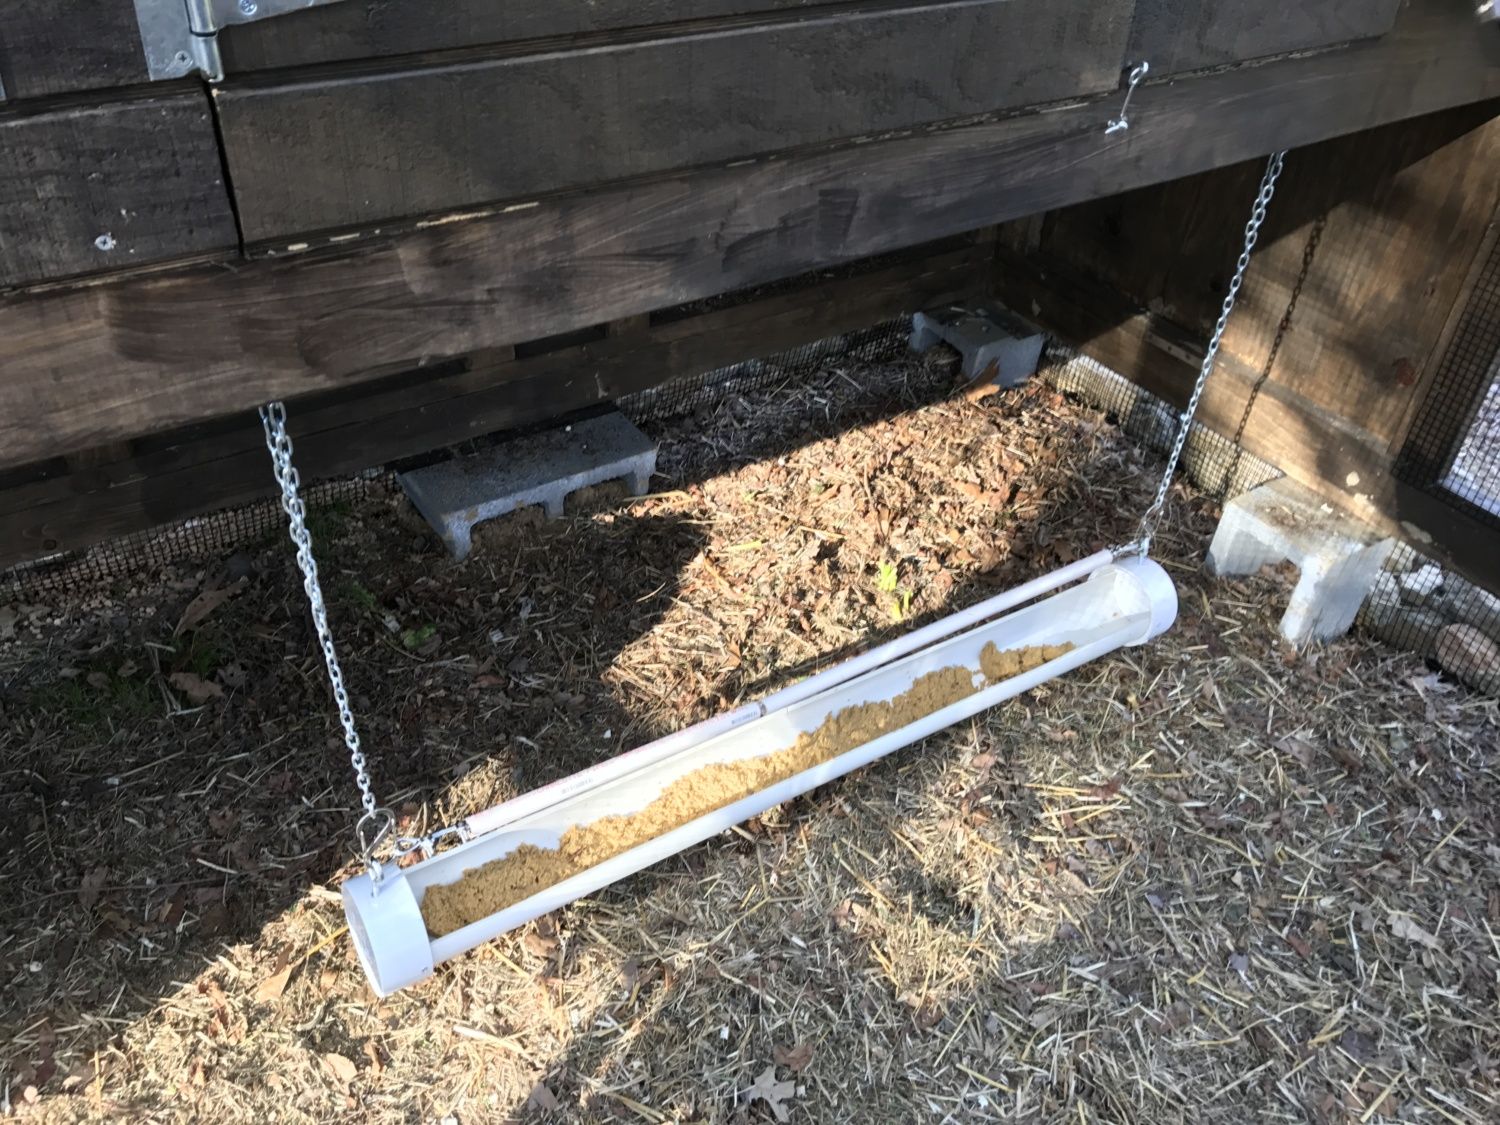
Finished product:
Getting the job done:
I found a piece of 5’ long piece of 4” inside diameter PVC at home. I designed based on that.
Requirements:
- Off the ground
- Variable height
- Removable for cleaning
- Able to install a baffle, also removable for cleaning
- Sufficient for full daily rations for a flock of 10-16 birds
I over-engineered and also paid more than needed because of poor prior planning.
Materials:
- 4” inside diameter PVC pipe, 4’ long
- PVC end caps
- Eye bolts to screw into the PVC (2), 3-4” long
- Nuts (4, to double-nut the eye bolts to the PVC to prevent the nuts from backing out
- Eye screws to screw into the structural 2x8 of my coop’s henhouse (2)
- I got ⅜” or 5/16” I think
- Two wide washers that fit the eye bolts
- Two lengths of chain 30” each (that ended up being too long)
- S-carabiners (4, for connecting the chain and eye bolts, and chain and eye screws)
- Definitely could have used much cheaper s-hooks or carabiners. Bought chain before I chose these, and the chain link was too small for the cheaper alternatives
- ½” screws to connect the end caps to the PVC pipe. This helps keep the caps on but was also quicker than glue, definitely not toxic, and removable if needed
- For the baffle:
- 4.5’ length or more of wire
- I bought 1/16 (I think) because that's what I needed to used the fasteners that were pictured. Could probably use thinner wire and crimps
- 4’ of ½” PVC pipe
- I cut this down by about 10” by the end. Your mileage may vary.
- Wire clamps suitable for the gauge wire you have. Mine look like this.
- 4.5’ length or more of wire
- Jig saw, to cut the PVC lengthwise
- Saw horses
- Quick clamps, to cut the PVC, sand down, and install caps
- Chop saw (not necessary but convenient to cut the PVC to length)
- Sandpaper, sander, or sanding sponge. I think we used 100 grit
- Drill and bits for each screw size
- Tiny wrench for the wire fastener nuts, or a needle nose
- Tape measure
- Marker or pencil
- (Optional) Wire cutter
Steps:
- Cut PVC to length
- Cut PVC to trough. I cut a little less than ½, more than ⅓ off the pipe.
- I drew a somewhat straight line from end to end with a tape measure and two assistants. I then eyeballed the second cut so I'd have a bit more than 1/2 the pipe for my trough. I measured the cut to the mark on one end and matched the same on the other end.
- Sand edges down well
- Clean
- Attach end caps with screws. With all screws in this project, Drill holes first.
- Attach eye bolts.
- Put washers on the inside of the PVC, and double nut. Wrench the nuts right to each other.
- Attach eye screws to your Coop to the length of your PVC.
- Attach s-carabiners to the eye screws and chain, and the eye bolts and chain.
- Adjust height
- Attach fastener to one end of wire
- Attach wire loop to on s-biner on the eye bolt. This is why the PVC-connected eye bolt should be 3-4 inches long. It allows for a good starting baffle height.
- Thread the ½” PVC onto the wire.
- Start to create the second end loop.
- Stretch the wire across the structure. This may be more efficiently achieved with a partner.
- Screw or crimp down your wire fastener as you hold the wire as tight as possible across the feeder.
- Add food and watch chicken TV.
I’m sure I’m forgetting important details. If I’ve omitted useful tidbits, please let me know and I’ll update the OP. Oh, I spent about $50 :eek!: Kinda ridiculous. And I complete guessed about the length needed. Probably could have been shorter for 10-16 birds?
Thanks to this community for providing everything I have so far needed to start our chicken journey. Thanks to these threads on fermented feeders, which provided a jumping-off point and ideas for my feeder. Among many other things, I know from these threads that I need to watch for irritation of my birds’ combs and wattles. I can raise and lower the baffle as needed.
- https://www.backyardchickens.com/t/1146961/lets-see-your-dishes-for-feeding-fermented-feed
- https://www.backyardchickens.com/t/1119025/fermented-feed-feeder-for-small-flock
- https://www.backyardchickens.com/t/1131907/diy-trough-feeder-using-gutters
- [And more!]
It’s been in use for a grand total of two days, three feeds, and only with 4-week old standard birds. They immediately started standing on the food when I hung it and added feed. I have not seen anyone stand on or in it since adding the baffle, and no evidence of poop was discovered.
Here are some photos:
Cutting the PVC into a trough. This is me practicing bad safety. Tie up your hair, and wear eye and ear protection, folks!:
Fasten the end caps:
There are the end cap fastening screws:
Eye bolts in the end caps:
Too-expensive s-biners attached to the eye bolts and wire, and the wire u-bolt clamps.
Finished product:
Getting the job done:


