DIY Horizontal Drink Stick
Equipment:
3 6-inch by ½ inch PVC tubes
2 2-inch by ½ inch PVC tubes
4 PVC T-pieces for horizontal nipples
4 horizontal nipples
1 ½ inch Dura PVC cap
1 ½ inch PVC hose connector
* Use durable plastics for indoor/outdoor use to avoid rust.
Other Supplies:
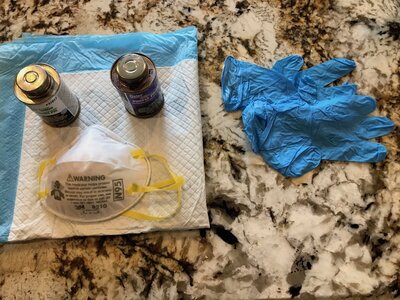
PVC primer
PVC cement
File
PVC cutter
1 garden hose desired length to water source
1 garden urn rain barrel with spigot

Assembly Instructions:
1. First if have one long length of PVC tubing ½ inch just cut 3 sections that are 6 inch a piece and 2 sections that are two inch a piece.
2. File cut ends smooth and remove any debris.
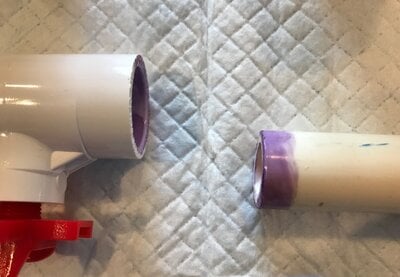
3. Before you connect stick, prime each opening and outer edge of PVC at connections with PVC primer and then apply PVC cement. Attach PVC t-pieces to each six-inch ½ inch PVC tube. Hold for 30 seconds to avoid back push. Wipe outer tubing excess off with rag. Screw in horizontal nipples to t-pieces. No need to cement nipples as they do not leak and you will want to unscrew them to clean out every now and then or replace as needed. (Now FYI here we got horizontal nipples from My Pet Chicken .99 per nipple and are not supposed to freeze in water, but may also use cup.) See photos for examples.

4. Brush on PVC primer and cement to inner and outer edges that you intend to use as shown.
5. Attach 2-inch ½ inch PVC tube to left and right end of stick after applying PVC primer and cement using same technique.
6. Attach ½ inch Dura PVC cap to left end of stick after applying PVC primer and cement.
7. Attach ½ inch PVC hose connector to right end of stick after applying PVC primer and cement.
Finished product should look like this.

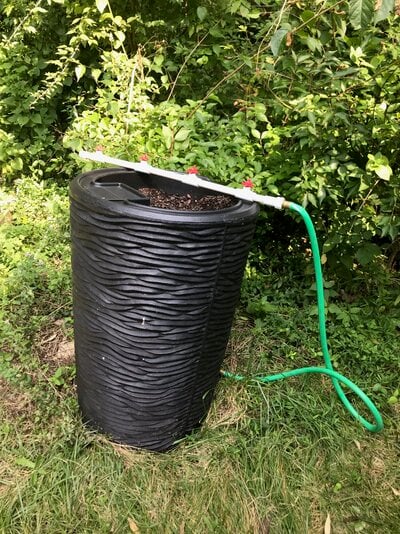
Attach horizontal drink stick when complete with hose attachment to hose that is attached to a rain barrel and Voila! You now have a closed water system that is clean and hygienic for your chickens using natural rainwater as your water source.
Pearls of Wisdom
1. If you do not have a rain barrel with spigot already attached, can add your own. For ease of use I purchased a rain barrel on Amazon with spigot and drain spouts already attached to avoid leakage or functional problems others found with own systems.
2. It is also important to purchase products made for potable water with no harmful chemicals or P65 cancer warnings when looking for garden hoses and rain barrel.
3. When setting up system remember it is gravity fed and will need height and possibly placing rain barrel on a stand. You may purchase these online and some are made to match rain barrel purchased. You may also make your own.
4. Always pick a rain barrel with a drain spout. You may need to empty and clean. I only use mine in the nice weather months due to freezing temperatures here and my chickens feeder and waterer go in during the winter. You can use a 10% bleach solution for cleaning barrel and line or a vinegar water mixture for sanitation purposes. This will not harm the chickens.
5. If you are in a warm weather location all year long this is perfect for independence and reducing daily cleaning and messes while taking advantage of our natural resources reducing costs of care through rain collection for water source.
6. You may also use drink stick with home water source for hose attachment but this is a little more expensive and will take up your water source attachment. I use mine from the house to water landscaping areas and my husband likes to wash the car so need that one free.
7. I use the rain barrel system and added a dual port attachment to my water output area. One port is for a water soaker hose that feeds the garden and the other goes to my nearby hen house. This saves tremendously on the old water bill and daily chore routines. It is much cleaner than the old fountain waterer lending to health and disease prevention. I use this system as my gardens and hen house are set away from the main house a little bit and I do not have a water line down to them.
8. Last but not least how does the rain go into the barrel? Well most people found the need to add a gutter on the back of the hen house roof similar to your own home and added a downspout that ended at the barrel where the water goes in. You get fill up faster this way. When no rains and water is low may need to add by hose to top.
9. If you look at other drinker set ups, others attached to a bucket or other waterers but require filling just less often. This system typically is not attached to a house hose line or outdoor water line.
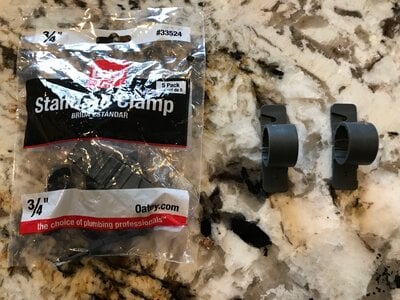
10. Use PVC clamps or pipe holders to attach drink stick to run area. This is best left outside to prevent damp litter inside chicken house.

You can be as creative as you want to be. Find the system setup that is right for you. Lots of resources on BYC!
See photo here complete system with hose and rain barrel. Just need to hook with PVC clamps to run. You may also use drink cups as an option as well if do not like nipples.

Hope you enjoyed the article! This is an easy, simple, and cost effective approach to adding a closed hygienic watering system for your flock.

